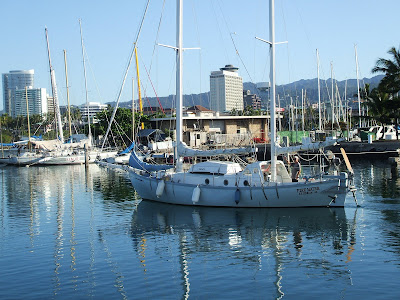
This blog began in late 2006 with the planning and preparation for a circumnavigation of the world in my 39-foot sail boat Pachuca. It then covered a successful 5-year circumnavigation that ended in April 2013. The blog now covers life with Pachuca back home in Australia.

Pachuca

Pachuca
Pachuca in Port Angeles, WA USA

Wednesday, April 29, 2009

Storm Trysail


I plan to make use of the storm trysail in the future for sailing in heavy weather (over 25 kt) and for heaving to (35 kt or more). The trysail will be paired with the staysail which will be hanked up the inner foresay with sheets passing through the shrouds, through the forward blocks, then to the winches.

I solved one problem and found another one with the trysail exercise. The doctrine states that the boom should be lashed out of the way, in my case on the rail. I never did like the idea of lashing the boom to the rail because of needless stress on the rail and possibility of chafing. Because the trysail must be hoisted high, clear of the mainsail stack pack, there is no reason that I can see why I can't leave the boom in place. In the closeup you can see that the boom is held up by the topping lift as usual, the mainsheet holds it down, and the ends of the boom are lashed to cleats on the coaming. You can also see that the trysail sheets are passed through the turning block on the coaming then to winches. The lazy jacks are no problem. In the photo they are loose but I will lash them low with cord. Also, you may notice two blue lines going to the stern corners of the boat. They are the running back stays which are now in position for the cruise to Seattle.

The problem is in the special track for the trysail. It is in two pieces: the lower piece starts off center and curves to the middle of the boom. The upper piece carries on to just below the radar. The problem is that the two tracks do not line up exactly, leaving a corner on one side when the slides go up, and on the other side when the slides come down. I had to go up three times to force slides around that constriction. This will not do, of course, because hoisting the trysail implies heavy weather which is no time to go up the mast. I'll attend to this problem possibly by grinding the corners down with a Dremel tool.

Communications Finished


Yesterday Ron and I signed off on the communications upgrade. I paid him $250 USD cash for his services which I consider a bargain given that he knew all of the tricks and traps of this kind of installation.

But wait, there's more!

In the morning I had reinstalled my venerable GME VHF radio and contacted the Coast Guard on channel 16 for a radio check. He got my ship's name and call sign and asked me to go to working channel 22A. I told him that I did not have channel 22A on my radio and thanked him for his radio check. When Ron came on board for the final visit in which he programmed all of the standard frequencies (about 30 of them) and gave me a rundown on how to use the HF radio I told him about the ch 22A problem and told him that at Hilo the Coast Guard had asked me to go to working channels 22A and 23A and I went to channels 22 and 23 because that was all I had. Then I had to fall back to channel 16 to reestablish communications.

The first thing that Ron said was that calling the Coast Guard for a radio check is a no-no and they frequently give the caller a serve about that. I replied that I figured that a working radio is a safety matter which should interest the USCG, but in any event they were polite though a bit formal. The second thing Ron said was that I had and old VHF radio and I could upgrade it for around $100.

I have high regard for the USCG and don't want to jerk them around during my stay in US waters, so I said to Ron let's do it. He said that he could get me a good price using his account but to ring Lenny at West Marine because they frequently had specials that beat even Ron's discount rate. I telephone West Marine and Lenny happened to answer. He said that they were running specials on an Eclipse VHF at $99 and a West Marine VHF at about $135. The West Marine had buttons on the microphone that allowed you to change channels which meant one-handed operation which is handy when things are tough. However I'm accustomed to punching in frequencies into the main radio so I went for the Eclipse. Then I heard a rustle of paper over the phone and he said “How does $88 sound?” I replied that it sounded great. He went away after I gave him my credit card information and came back with “How does $77 sound?”. I replied that it sounded like Santa Claus was talking to me. I met him at the head of the 500 jetty at 7.30 PM and he handed me the radio. I installed it this morning in about 2 hours working very carefully. (Remember: “First Do No Stuffup.”) I lost 30 minutes tracking down the blown 6-amp fuse that had been supplied.

I wired the VHF radio directly to the bus bars, as Ron had done for the HF system. It makes no sense to go through the 20-amp breaker when the radio has an in-line fuse of 10-amp (the smallest fuse I had in stock). The electrical connection to the Eclipse is different to that of the GME so I left the GME wiring in place in case I ever need or want to set it back up.

The top photo is of the new system above the seat at the navigation table. Below the black ICOM 700Pro HF radio is the Pactor IIusb HF modem. The installation of the Icom and Pactor units are rock solid. I proudly told Ron that they would survive a rollover. (The tuner installation is good too, if I say so myself.) I'll install wood trimming around the equipment when I get access to good wood working tools. Above it all is the white Eclipse VHF radio.

The Eclipse looks like a plastic toy. Do not be fooled. It features:
SC-101 DSC (Digital Selective Calling)
Programmable Scan, Priority Scan, Dual Watch
All USA/International and Canadian Marine Channels
NOAA Weather Channels and Weather Alert
You can connect a GPS receiver with an NMEA 0183 interface and have the radio automatically broadcast your Lat and Long on a DSC distress message or other communications.

The third feature is interesting. I thought that the lack of “Alpha” channels (e.g. 21A, 23A, 62A) represented some gross deficiency in my GME radio. But it looks like these “Alpha” channels are kludges that are specific to only the USA and Canada. With the USA channel assignments that I am now using channel 22 yields channel 22A – there is no channel 22. When I return to Australian waters I will change the set to the “International” channel assignments and the “Alpha” channels will disappear.

The lower photo shows the new shelf supporting the Pactor modem. I have suspended from the HF radio shelf using the same thru-bolts of the HF radio mounting bracket.

Sunday, April 26, 2009

Weather Fax via Airmail


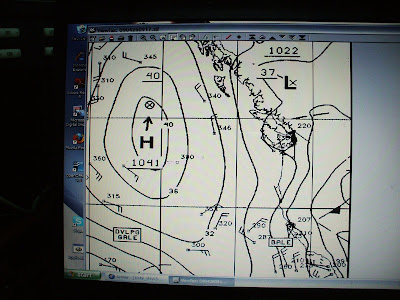
The "Airmail" software of SailMail provides a pretty good window into weather faxes.

In my previous setup I had to remove the external power from my laptop to give me a reasonable chance of getting a clear weather fax because external power seemed to generate noise. That was OK as long as my battery time supported it, but for a while I was getting only 10 minutes of battery time on my laptop. (Then it went into remission and now I'm getting 1.5 hours) The weather fax input is now via a cable between the pactor modem and a USB port on the laptop, not the microphone input jack.

A weather fax viewer is provided. It allows me to zoom and pan for better examination of areas of interest. The photos at the side demonstrate this.

The top photo shows the fax covering a wide swath of the N Pacific ocean from 120W to 170W. Seattle is at the right just below the "L". Hawaii is at the bottom just to the left of the "L".

In the middle photo I've zoomed to the Hawaii area for a better look. At the bottom I've zoomed to the Seattle area.

Very handy.

Friday, April 24, 2009

Works Progress


The opposite photo shows the inside of the Icom 130 automatic antenna tuner.


This morning I cut one of the standard air vanes and the light air air vane to clear the davits cross pipe.

The opposite photo shows the standard air vane after being trimmed with the jig saw. The light air vane is marked for cutting. I will remove the electrical tape covering the edges of the section to be cut out, then cover the cut with matching electrical tape.


The bottom two photos show the finished product with the cut out section placed loosely on top of them.


My guess is that I will use the cut-down light air vane all of the time, since its greater width will more than compensate for the area lost from the standard air vane.

Also, I have been advised to use these as a template and cut out some spares out of ply board. (Until recently the Monitor air vanes were made of ply board.)

Thursday, April 23, 2009

Communications Installed

Ron spent about two hours on the boat installing the new HF radio, tuner, and modem. At the end of the session everything seemed to be working OK. Ron spoke with a ham operator on another island and we downloaded some weather files. Tomorrow I will spend a few hours bolting and screwing things into place.

On another topic, yesterday I mentioned the difficult time I had crossing the H1 freeway to get to the nuts & bolts shop. This morning there was a news item on the radio about a man in critical condition after having been knocked down by a car while walking down an off-ramp of the H2 freeway heading for the Kamehameha Hwy, the same highway where I had wound up yesterday.

Wednesday, April 22, 2009

Sailmail


I have downloaded the "Airmail" software used by SailMail. Ron showed me how to use the software via the internet as a fast way of getting acquainted with many of its features.

On the boat I'll be using a Pactor modem whose sounds and flashes reminds me of the modems that we used before the advent of the Internet. However, instead of using a telephone line as the communication medium it uses the short wave radio.

These are two screen shots of my laptop which should best be seen enlarged (double click the left mouse button).

The top screen shows the "propagation" screen. On the left is the list of the Sailmail stations throughout the world. When you highlight one of the stations you get the corresponding display on the right. In this case we are looking at the Honolulu transmitter. The left column of the display at the right lists the frequencies of the Honolulu station. Across the top are the hours of the day, GMT. The main matrix indicates the quality of the signal to be expected for the various frequencies at the various times of the day. The cells in green indicate the good propagations. The ones in red indicate poor ones.

My understanding is that I will be able to click onto one of the cells and the laptop will automatically tune the HF radio to that frequency. I will then listen to the modem. If it is not making a chirping sound, indicating that it is busy handling another connection, I will then request a connection.

The second screen shows the mail screen. On the left you can highlight in-box, out-box, etc.
The out box is populated by emails that I have composed or emails generated by the software as a result of my requests for grib files, faxes, weather reports, etc.

Once the modem connection is established the contents of the out box are sent out. After this has been done any incoming mail is delivered. The email has the look and feel of Outlook or similar email system. It can handle multiple destinations, CC's, and attachments.

The lower photo shows a GRIB file that I downloaded. It shows the location of the boat, wind arrows, and isopressure lines.

Architecture of Honolulu


I have been doing a lot of bicycle riding in the last two weeks, usually connected with the need for fasteners and other gear associated with the wind vane and communications projects. Several days ago I made the longest foray, to Hawaiian Nuts and Bolts, about 1.5 hours of riding each way, and to the other side of the H1 freeway. Getting across that freeway from the Nimitz Hwy involved a nightmare walk along a flyover. Next to the four lanes of freeway was a strip about two feet side between the lane and the curb. I walked on the curb walking the bike along that narrow strip with the noisy trucks whizzing by just inches away. I survived that and fortunately discovered that there was a proper bicycle path which took me safely under the freeway to the Kamehameha Hwy.

Anyway, today I needed to do a 45-minute ride to POP near Pier 38 to get a stainless steel eye bolt to fit through the 2" diameter rail in my cockpit (to which I will attach one of the blocks for the self steering control lines). It was a sunny and crisp day so I decided to take photos of some of the buildings of Honolulu along the way.

By design or accident Honolulu frequently pairs identical buildings reasonably close to each other and I find this very appealing.

Glass is used very effectively in many of the buildings, resulting in nice reflections of the surroundings.

And you will notice that there are no rigid rules about symmetry.

Monitor Installation OK

Ron has looked at the photographs of our Monitor installation and gave the following reply:


Trimming down the standard airvane by about 2" will have no adverse effect. Just remove the tape that's on the airvane edge, cut it with a jigsaw, and replace the tape - we use standard 3M electrical tape; it lasts forever. Note how the original tape is fastened at the bottom and duplicate it.
All the photos you sent show a very good installation. Don't worry about a few inches of height difference; go out & sail!
Cheers,
Ron

Monday, April 20, 2009

Monitor Installation


The monitor installation is almost complete, thanks to the invaluable assistance from Jeff, who led the way.

The top photo shows the stainless steel wheel extension with the control lines passed to a double block on the starboard rail. Note the brass clips for quick release and the aluminum tabs used to tighten the lines. These tabs are an innovation that Jeff has successfully used for years.


This photo shows the complete path of the control lines. Scanmar recommends rigid cheek blocks bolted onto the coaming but we had a problem with the short distance between the coaming and the wheel not allowing enough of a gap to accommodate the required tensioning setup.

The blocks are new very high quality Harken with bearings which should deliver minimum resistance.


To the right is a side view with the watervane in the "up" position.


This photo was taken from the center line of the boat. Ignore the ladder as a reference, since it is crooked. Using the backstay as the reference confirms that the unit is centered and plumb athwartsship.


This is an important photograph which shows the relationship of the top of the watervane to the surface of the water. The company likes a 6" clearance. The design for Pachuca called for a 0" clearance, i.e. top of watervane at water level. Happily the top of the watervane is actually more than 2" above the surface of the water.

Sunday, April 19, 2009

Fire Water


Yesterday morning Richard motored out of Ala Wai Boat Harbor aboard his ketch Fire Water. Arnold and I had met Richard and his wife Doris (who flies in and out) at Hilo. Fire Water has a full length keel and is extremely solidly built. It weighed in at 33,000 lb fully laden, which is considerably heavier than Pachuca, which is about 5 ft longer. Richard says that it is a relatively slow boat but extremely stable in a storm. Last year one of the competitors in the biannual TransPac race abandoned (and scuttled) his boat in a storm between Hawaii and California. Richard and Doris were about 200 nm away in the same storm relaxing inside of the boat. He's been around the Pacific Ocean about a dozen times and has made the Hawaii-Juan de Fuca run sixteen times, if my memory serves me correctly.

Richard is headed to an indeterminate Hawaiian Island (Maui, maybe, or perhaps Molokai) for an indeterminate amount of time. However, it is likely that we will both be sailing the NE Pacific in May and we plan to keep in daily contact. Starting on Wednesday by which time I might have my new communications system working, he'll be trying to hail me at a particular time on a particular frequency. Richard has also provided me with all sorts of radio schedules for Armed Forces Radio, ship-ship communication, "Summer Passage" radio for good advice from Don the operator, etc.

Richard will be heading to North of Juan de Fuca, to an Indian reservation in Canada where his wife Doris' people live.

Enlarge the middle photo (double click with left mouse button) to get a nice closeup of Richard on his boat. He has Aries wind steering at the back. In the background is the back of The Fuel Dock, one of my favorite places in the entire planet. (There is enough material in The Fuel Dock story for an excellent Steinbeck novel - "Fuel Dock Row"? "Of Mice and Mariners"?)

The bottom photo is of Jerry working on the radar yesterday. (I document everything!)

Saturday, April 18, 2009

Radar OK

Jerry phoned me early this morning and said that he was visiting the boat to have a go at getting the cable problem sorted out. He went up the mast and did some work on the termination block. He said that the wire ends were somewhat corroded and asked if the cable had been in the weather before it was actually installed. I said that it was entirely possible. He did what he could then we powered up the system and still "no data". He decided to swap out the entire cable.

He tied a cord to the end of the cable and we dropped it down the conduit, then around the bend at the deck level, then into the cabin. He asked how the cable was passed inside the boat. I told him that my philosophy was to sacrifice beauty and aesthetics in favor of practicality. The cabling was straight forward and accessible, even if it meant sections of cable runs visible from inside the cabin. He approved.

Jerry took off the terminator of the radome end of the cable then we threaded the entire thing from the C120 chart plotter, along the cabin to the mast, into the mast, through the deck and around the conduit that takes the cable around the mast step, then up the conduit to the top.

Then we powered up the system and the radar was working.

The Jerry helped me sort out a "Seatalk Failure" messaged that I was getting when I powered up the auto pilot. He tracked it down to two dangling Seatalk wires that had come loose during my preparations for the new HF radio.

Jerry left at 12.30 PM after about 3 hours on the boat. I am supposed to pay for any time in excess of 4 hours, and given that he and his son had spent one hour on board on their first visit I would expect to get billed for some excess time. I told Jerry to add up the time and let me know if I owed him anything but I get the feeling that I won't be billed for anything.

On the brighter side:

1. Raymarine verified my warranty rights and did not give me any difficulties with the repair. They are back in my good books. I got a bit sour on them regarding my problems with the ST60 wind instrument.
2. The mast steps were extremely helpful. Several times Jerry commented on how easy it was to get to the radome, compared to most boats where he had to work from a boatsun's chair. He was able to stand on the first crosstrees and work in relative comfort.
3. As I indicated earlier, the simple and practical routing of the cable inside the cabin saved us a lot of time.

Thursday, April 16, 2009

Monitor Wind Vane Steering


Here are two photos of the partially fitted Monitor wind vane steering. Notice that the boarding ladder is still in the water and the water paddle has not been fitted, nor have the control lines. From the side shot you can see that the air vane is too long and will have to be trimmed.

The installation is centered, plumb, and solid as a rock.

Also, the outboard motor will have to be moved to allow cleaner air to the Monitor.

Radar

Jerry and his colleague visited the boat this afternoon to investigate my radar problem. They had a replacement cable with them. I powered up the unit to demonstrate that it was failing with a "No Data" message. Jerry went up the mast, removed the radome cover which he handed to me, and connected the new cable. We passed the new cable through the main hatch then he connected it up to the C120. We powered the C120 and the radar was working with the new cable.

Before Jerry disconnected the old cable from the radome he had noticed that the white wire was loose from the connector, and he inserted it back it. So after the successful test with the new cable he went up and reconnected the old cable with the white wire in place and we tried the C120 again but still had the "No Data" notice from the radar. Jerry had one look at the connection at the base of the mast where the cable had been split and said that there was no problem with that. He's pretty sure that the loose white wire is for data but there must be something else going on.

The fundamental question was (1) should we go to the trouble of fitting in the new cable, which is an involved process because we must pass the thick cable around some tight bends and up the mast conduit or (2) should he work on the connector in the radome and get the old cable working. Because the old cable is in conduit in its run down the mast and the section inside the boat is in a benign environment it is unlikely that there is anything wrong with the cable itself, in my humble opinion.

Jerry decided that he will return to rework the connector inside the radome. He left the new cable on Pachuca just in case.

The good news of today was:

1. The scanner in the radome is OK, and there is no evidence of invasion of water
2. Raymarine checked the information that I had given to Jerry and I am fully covered by the Raymarine 2-year warranty.

Tuesday, April 14, 2009

Works Progress

Things moved fast and unexpectedly with the wind vane installation on Sunday. I had previously marked the center line of the transom and the ideal centers of the four tubes. Working alone with the same focus and pace as if I were disarming a bomb I managed to hang the body of the unit from the davits and by attaching other lines at various points got good sensitive control which enabled me to position it almost exactly in place - centered and plumbed. The boarding ladder in the down position was very useful. (After the installation I will unbolt the ladder, remove it from below, then insert it from the top.)

I put on the airvane and started to explore and analyze. It took about an hour to identify the biggest problem. Because the lower tubes were square to the unit and the sloping transom is almost flat the U-brackets had to be positioned almost vertically. That placed the lower holes of the lower brackets much higher than we had planned.

Then I got lucky. Jeff from a beautiful 40-footer 7 slips away saw me working, came over, and I discussed the problem with him. Jeff has his own Monitor wind vane, has plenty of time on his hands until his wife joins him in six weeks, and had earlier offered to help me. After much analysis and discussion we concluded that the safest course of action was to mount the brackets according to specifications and accept the inevitable raising of the unit. I drilled a thin pilot hole which confirmed that the hull was even thicker that I had expected. To orientate the brackets properly and accommodate the large backing plate washers provided resulted in the movement of the lower tubes 90 mm up the slope of the transom, resulting in the raising of the unit another 50 mm off the water.

Unfortunately we will have to cut about 35 mm off the top of the airvane but I preferred this than compromising the mounting of the unit. This does offer the additional advantage of raising the top edge of the watervane to 50 mm out of the water. I considered modifying the overhead davits pipe during the hardstanding in Seattle, but this would allow the accommodation of the full-sized standard airvane only and not the longer light-air one, since the full size light airvane will strike the davits. At this point I do not think that the extra 35 mm of airvane justifies the expense of modification of the stainless steel davits. Much depends, of course, on how the system performs on the Seattle leg.

By the end of the day we had the four brackets in place with the upper extension tubes thru-bolted. The unit appeared to be almost perfectly centered, vertical athwartships, and with a small forward rake which we would try to eliminate but did not consider worth worrying about too much.

Jeff and I resumed work on Monday morning and spent three hours inserting the compression cylinders in the joins of the upper tubes and bedding the U-brackets at the transom with sealant.

We resumed work early this morning and inserted the compression cylinders in the joins of the upper tubes, bedded their U-brackets with sealant, then installed the diagonal supports which included cutting off about 50 mm from each tube, bending the ends, and the insertion of two more compression cylinders.

This concluded the installation of the main body of the wind vane. I am very happy with the result. The unit is centered, plumb, and solid as a rock.

The next tasks are relatively easy: mount the steering wheel extension and set up the control lines which will involve the purchase of some very expensive roller bearing blocks.


I then telephoned Ron about the communications system. He wants me to join Sailmail and we will talk at the end of the week. My guess is that he will install the system next week.

I then spoke with Jerry and the radar cable arrived yesterday. He will visit Pachuca on Thursday morning and we will try the radar with the new cable. If that was the problem we will then have to feed the new cable down the conduit inside of the mast, probably using the old cable as a "pull through"

Saturday, April 11, 2009

Princess TaiPing

The Princess TaiPing is well past the Northern Marianas and is approaching Taiwan. You should be able to see her position at http://share.findmespot.com/shared/faces/viewspots.jsp?&glId=0m9SPnQlDcOmdcU57Nqs0z1BChkPIixQB (Select "Hybrid" for an interesting presentation)

Rob Nikzad has written an excellent account of his experience on the TaiPing and I highly recommend it to anyone who wants to get insights on what it is like to sail on a replica of a Ming Dynasty war ship with two days' notice. Rob's account is at http://nkzd.org/

Wednesday, April 8, 2009

Communications Work and Wind Vane


I enlarged the opening to accommodate the larger Icom HF radio, and bolted the mounting bracket onto the shelf. The radio will be able to survive a roll over (heaven forbid!) without budging.

After some thought and experimentation I came up with a simple and elegant solution of how to mount the automatic tuner in the lazarette. There was no need for bits of wood, epoxy, or screwing into the hull. I have strapped the tuner the wedge-shaped piece of wood that holds the backstay chainplate. It is out of the way, above water that might accumulate at the floor of the lazarette, and firmly fixed with four bolts.

Then the Pactor IIusb modem arrived and Ron handed it to me yesterday morning. I decided to mount it below the HF radio, on a new shelf suspended from the HF radio shelf above with the same bolts used to fix the HF radio bracket. I cut the hole with the electric jig saw that Wally loaned me.

At this point all preliminary work has been done but the installation of the HF radio, tuner, and modem cannot be completed until the wind vane has been installed, speaking of which ...

The Monitor wind vane was delivered to The Fuel Dock by FedEx early this afternoon as promised. Audry telephoned me and an hour later I went to pick it up. Carey loaned me the store's trolley and before I got to the jetty's gate there was Richard to help me get the box on board. He had seen me pushing the box from the store and figured that I could use a hand.

Tonight I'll read the installation instructions very carefully. Tomorrow morning I'll unpack the various bits and start planning the installation. Jeff in slip 850 has a Monitor and has offered to help me. Richard has offered to help, but he is planning to sail out on Sunday and I don't want to take up his time in these final days of preparation. Dieter would have helped too but he is also leaving this weekend.

My God, they're all leaving: The Princess Tai Ping last month, Jimmy last week, John and his dog Taco left for California yesterday morning, Richard and Dieter will leave this weekend. But not all is lost. Richard and I will sail to the Pacific Northwest in loose company in May and we will keep in daily touch by radio. I hope to visit Dieter at his home near Vancouver. And you never know, I might even get a chance to see John when I pass through the San Francisco area.

The top photo shows the slots ready for the Icom radio and Pactor modem. The white piece of ply will be the shelf for the modem.

The second photo shows the bracket for the Icom radio bolted in place.

The third photo shows the Icom automatic tuner bolted in place.

And last but not least are John and Taco about to leave for the airport in Joel's car.

Sunday, April 5, 2009

House Boat


I don't think that I'm wrong in classifying this one as house boat.

Communications

Yesterday I was invited by Jim Routt aboard his Valiant 40 named "Alii Kai Too" for a demonstration of Sailmail, the software for using email while out at sea. I was pretty impressed and am looking forward to having it on Pachuca.

Today I was up at 6 AM to begin the preparation for the new system. I don't enjoy these projects because it invariably involves widespread disorder in the boat with tools and parts scattered from one end of the cabin to the other. Nevertheless it had to be done so I got on with it.

The results were better than I had expected. I have removed the Kenwood SSB radio and tuner, and all associated cabling. I left the coax cable hanging from the backstay for removal when we hook up the new system, and also left in place the power and earth wiring for the radio, well insulated, and clearly marked. This may be of use one day because it feeds off a dedicated 20 amp breaker. Ron wants to connect the new radio directly to the bus bars, and not through a breaker.

I then did some woodwork to make a larger opening for the new radio, bolted the mounting bracket in place, then fed the required cabling to the lazarette and forward to the power bus bars. Tomorrow I will prepare the mounts in the lazarette for the automatic antenna tuner. Ron wants the tuner to be as close to the antenna as possible, which means the lazarette. Yesterday I bicycled to Home Depot and found a bin full of offcuts, picked two pieces and told an employee that I was looking for ABP (anything but pine). One piece was oak, one was ash or maple. I took the oak and paid less than $1 per foot for about 5 ft. Because I was entitled to two free cuts I had the man cut two 10-inch lengths. Tomorrow I will use epoxy to fix these pieces to the counterstern section of the lazarette. When the time comes we will fix the tuner to this timber using screws.

That time will come after the installation of the wind vane steering because we will be doing some rough and sometimes frantic work in that area and I don't want to put the new tuner in peril.

Blog Archive

Contributors

Statistics Click Me