After putting the steering wheel back on, which I had removed in order to do the gas supply work in the lazarette, I went through my pre-cruise check list. Other than the short rides to and from the hardstand, the boat had not been out in the water since last year's Bunbury Cruise, so I could not take anything for granted.
I ticked off the following:
- Chart Plotter OK
- Radar OK
- AIS OK
- Trimble and Lowrance GPS's OK
- Autopilot OK
- Wind Speed Instrument OK
- Wind Direction Instrument OK
- Depth Sounder OK
- Engine levels OK (Topped up the coolant)
- Engine start and run (in gear, 1100 rpm to full temperature) OK
- VHF radio OK (Got radio check from station VN6DI)
- Navigation Laptop charge from boat's 12V OK
- USB Hub (which allows 2 GPS's to be connected to 1 laptop USB port) OK
- GPS antennas for laptop OK
- Marine Plotter and OpenCPN laptop navigation software OK
- Marine Stove OK
- Refrigerator OK
- Marine Head OK
- All winches clean, lubricated, and OK
- Diesel fuel tanks full and OK
- Water tanks full and OK
I'll check the HF radio during the cruise. I will not be using the Pactor III modem.
I won't be certain about the headsail and mainsail until I deploy them, but they are both in excellent condition and I expect no problem from them or their lines.
Today I brought two items of equipment up to date.
My flares were years out of date so I purchased a standard pack of 2 orange smoke and 2 red parachute rocket flares at a cost of $110.
The 406 MHz EPIRB beacon that I had purchase in New Zealand seemingly a lifetime ago expires this very month, so for $309 I purchased an Australian made Safety Alert model SA1G EPIRB, which boasts a battery life of 10 years, GPS accuracy of 3 meters and a transmit time of at least 3 days.
All major boat systems seem the be OK (I write while knocking hard on the wooden desktop!) and I declare the good ship Pachuca ready for sea.
Pachuca

Pachuca in Port Angeles, WA USA
Friday, February 6, 2015
Assembling the New Dinghy
On Tuesday I spent about 2 hours wrestling with the new inflatable dinghy trying to assemble it on the foredeck. In the end I had to give up on my goal of a complete assembly due to the short space between the life raft and inner forestay, the heavily curved deck, and worst of all, those two bollards along the center of the deck. I managed to fit floor sections 1 and 2 at the forward of the dinghy and sections 3 and 4 at the aft end, but could not come even close to lining up sections 2 and 3 so that I could snap them into place.
I do not want to sail long distances with the assembled dinghy either on deck or towed behind the boat, so my plan is to assemble the dinghy on deck with only sections 3 and 4 of the aluminum floor. This will be enough to support me on a ride to shore, where I will the fit sections 1 and 2. With the dinghy fully assembled I'll then return to the boat to pick up Brenda and whoever else may be sailing with me.
In the forthcoming cruise we won't need the dinghy until we reach Koombana Bay, Bunbury. I'll then assemble the dinghy and we'll tow it around the short distances of Geographe Bay. Then on our second visit to Koombana Bay I'll ship the dinghy, break it down, and stow it for the long sail to the marina at Mandurah.
If this plan works the reward will be a large dinghy with a super strong aluminum floor, capable of getting us to our destinations with dry bottoms, dry cargo, end even dry feet. ... IF!
Galley and Plank Finished
A few days ago Paul delivered the lids of the refrigerator and icebox which he had covered with stainless steel. He did a fine job and fit is very good. Note that the s/s surfaces fit into a rim of wood, which I plan to sand and varnish before the end of summer.
I had earlier picked up the s/s barrier made by Bret Snedden of Custom Sheet Metal in Midvale, the same man who had produced the counter top sheeting. Bret made the barrier from 20mm square tubing and the length was to within 0.5 mm length of my specification and the fit was perfect. The barrier prevents water from running from the sink area across to the refrigerator compartment. Two days ago I bedded the barrier onto silicone sealant and screwed it down with two s/s pan head screws.
I also tried out the new boarding plank and it has been a big success. The beauty of the system is that it uses the aluminum boarding ladder that was made for Pachuca in Port Townsend, USA. Whenever we are cruising and want to go over the side for either a swim or to board the inflatable tender, I'll simply undo the ropes holding the wood plank (of 18mm marine ply) to the ladder and stow it away. I'll also remove the two bolts holding the piece of timber at the curved end of the ladder and stow that piece too.
The photo of the plank was taken at moderately high tide, but the plank comes into its own when the 1-meter tide is low, lowering the boat to the point where even I have trouble getting on and off. At such times the ladder will be at a steep angle of perhaps 30 degrees.
The plank will be fixed at the boat end and slide over the jetty as the boat moves around.
 |
| Note the s/s barrier in front of stove |
 |
| Square tube barrier between sink and fridge |
I had earlier picked up the s/s barrier made by Bret Snedden of Custom Sheet Metal in Midvale, the same man who had produced the counter top sheeting. Bret made the barrier from 20mm square tubing and the length was to within 0.5 mm length of my specification and the fit was perfect. The barrier prevents water from running from the sink area across to the refrigerator compartment. Two days ago I bedded the barrier onto silicone sealant and screwed it down with two s/s pan head screws.
 |
| Boarding Plank |
The photo of the plank was taken at moderately high tide, but the plank comes into its own when the 1-meter tide is low, lowering the boat to the point where even I have trouble getting on and off. At such times the ladder will be at a steep angle of perhaps 30 degrees.
The plank will be fixed at the boat end and slide over the jetty as the boat moves around.
Sunday, January 25, 2015
New Inflatable Dinghy
A troll through the internet confirmed what I had learned the hard way about inflatable dinghies: It is the glue and not the material that fails over time. The material can be easily patched but once the glue degenerates the dinghy is a write off. I've got a Bombard and a Zodiac stored below my verandah for disposal to prove it. The Bombard was in great shape when I departed on the circumnavigation in 2008. In the six years of storage in cool, dry, protected environment of the garage the glue degenerated spontaneously.

Last week I purchased an Aristocraft "Bayrunner" inflatable with seams that are hot welded rather than glued. Like most things, the dinghy is made in China, but I am putting my hopes in the PVC material that is sourced from Germany.
The vaunted Hypalon material for inflatable dinghies is not amenable to thermo welding because it is rubber based. Dupont must have seen the writing on the wall because it ceased production of Hypalon in 2012. The future seems to be thermo welded PVC.
Because the instructions were execrable even by Chinese standards it took Brenda, Stephen, and myself a full 3 hours to assemble the dinghy. After 2.5 hours I gave up and declared that Youtube was our only hope. Sure enough we found videos on the Web that showed us the way.
The dinghy is heavy at 52 kg (114 lb) but the weight is distributed over two bags, one for the dinghy itself and one for the aluminum floor. Installing the aluminum floor is a bit of an effort, but the result is superb and I am looking forward to our first ride in it.

I wanted the 2.7m version, but they were sold out in the Perth area with no hope of one until March, which is much too late for the upcoming Bunbury Cruise. So I asked for the 2.4m version (the same length as the Zodiac) but it too was sold out. I had to settle for the 2.9m (9' 6") version, and the salesman knocked off $100 to make me feel better, making the total cost $1250.
 |
| Dry Run |
Last week I purchased an Aristocraft "Bayrunner" inflatable with seams that are hot welded rather than glued. Like most things, the dinghy is made in China, but I am putting my hopes in the PVC material that is sourced from Germany.
The vaunted Hypalon material for inflatable dinghies is not amenable to thermo welding because it is rubber based. Dupont must have seen the writing on the wall because it ceased production of Hypalon in 2012. The future seems to be thermo welded PVC.
Because the instructions were execrable even by Chinese standards it took Brenda, Stephen, and myself a full 3 hours to assemble the dinghy. After 2.5 hours I gave up and declared that Youtube was our only hope. Sure enough we found videos on the Web that showed us the way.
The dinghy is heavy at 52 kg (114 lb) but the weight is distributed over two bags, one for the dinghy itself and one for the aluminum floor. Installing the aluminum floor is a bit of an effort, but the result is superb and I am looking forward to our first ride in it.
I wanted the 2.7m version, but they were sold out in the Perth area with no hope of one until March, which is much too late for the upcoming Bunbury Cruise. So I asked for the 2.4m version (the same length as the Zodiac) but it too was sold out. I had to settle for the 2.9m (9' 6") version, and the salesman knocked off $100 to make me feel better, making the total cost $1250.
Wednesday, January 14, 2015
Gas Work Completed, Boarding Plank
The boat's gas system is now working and the new marine stove is operational.
I tested all of the couplings with a soapy water applied with a paint brush and after eliminating one small leak everything was safe.
Note in the photo how accessible are the gas cylinders and the manual selector switch above it. The old system was set up terribly, with the cylinders hidden around the corner and the selector switch very hard to find, let alone reach and manipulate.
I then turned my attention to finding a way to make boarding of the boat from the jetty walkway easier and safer. The problem is that the Fremantle Sailing Club has anachronistic fixed jetties which means that the boats are constantly dancing around their pens and worse, going up and down with the 1 meter tide. When the tide is very low even I have trouble getting to the boat, much less passing supplies and equipment to it. To date I have neither fallen into the water nor dropped anything, which I credit to focusing very hard when I am getting on and off the boat.
I've been nudged into action by my invitation to Bill and Pat, friends that I've met through Brenda, for drinks aboard Pachuca after I return from the Bunbury Cruise. It is unfair to ask them, other guests, and Brenda to take that big step across the gap onto the moving boat.
I settled on the idea of setting up the boarding ladder as a part-time boarding plank. The advantage of this is that I will not be burdened with yet another piece of large equipment that I must either carry on the boat or somehow hang from the jetty. To this end I have cut a piece of 18mm marine ply to fit along the length of the ladder. The ladder will be fixed at the boat end and move at the jetty end. I'll also rig a rope rail from the jetty post to the boat and drop the top rail on that side of the boat so that guests can step directly onto the boat. If it works I'll name it either Bill's Bridge or Pat's Plank in honour of the guests who inspired me into action.
Yes, setting up the system for guests will be awkward, but if it work as planned I may be able to find faster ways of setting it up.
I tested all of the couplings with a soapy water applied with a paint brush and after eliminating one small leak everything was safe.
Note in the photo how accessible are the gas cylinders and the manual selector switch above it. The old system was set up terribly, with the cylinders hidden around the corner and the selector switch very hard to find, let alone reach and manipulate.
 |
| Gas Detector in Position |
 |
| Cylinders and Selector Above Very Accessible |
I then turned my attention to finding a way to make boarding of the boat from the jetty walkway easier and safer. The problem is that the Fremantle Sailing Club has anachronistic fixed jetties which means that the boats are constantly dancing around their pens and worse, going up and down with the 1 meter tide. When the tide is very low even I have trouble getting to the boat, much less passing supplies and equipment to it. To date I have neither fallen into the water nor dropped anything, which I credit to focusing very hard when I am getting on and off the boat.
I've been nudged into action by my invitation to Bill and Pat, friends that I've met through Brenda, for drinks aboard Pachuca after I return from the Bunbury Cruise. It is unfair to ask them, other guests, and Brenda to take that big step across the gap onto the moving boat.
I settled on the idea of setting up the boarding ladder as a part-time boarding plank. The advantage of this is that I will not be burdened with yet another piece of large equipment that I must either carry on the boat or somehow hang from the jetty. To this end I have cut a piece of 18mm marine ply to fit along the length of the ladder. The ladder will be fixed at the boat end and move at the jetty end. I'll also rig a rope rail from the jetty post to the boat and drop the top rail on that side of the boat so that guests can step directly onto the boat. If it works I'll name it either Bill's Bridge or Pat's Plank in honour of the guests who inspired me into action.
 |
| Proposed Boarding Plank |
Yes, setting up the system for guests will be awkward, but if it work as planned I may be able to find faster ways of setting it up.
Friday, January 9, 2015
Gas System
The attempt to fire up the new marine stove has led to an upgrade of the boat's gas delivery system. The stove was not getting gas and I tracked the problem to the cylinder selection switch which worked in one position but not the other. Replacing that switch would require the extraction of the entire gas delivery assembly so I decided to take the opportunity to replace as much of it as possible.
Starting at the gas cylinders the components are as follows:
1. Hoses from cylinders to manual selector switch
2. The manual selector switch
3. The gas cutoff solenoid switch
4. The pressure reduction valve
5. The hose connecting to the copper gas line that supplies the galley
The first item was not critical since I had replaced those hoses in Hawaii about 4 years earlier. However, I had to assume that the other items dated from 1983 when the boat was built. I was particularly concerned with the last item, a fairly shabby looking flexible hose.
It took a bit of searching but my friends at Gas Components Australia at 1/4 Panama St, Canning Vale were able to replace everything but the solenoid switch. I can live (literally) with that solenoid switch because the only consequence of it failing would be the shutting off of the supply of gas into the lines.
The photo tells the story, with the old items at the back and the new ones at the front. The black rectangular component in the back is the solenoid switch, that will fit between the selector switch and the new 2-stage regulator.
The old setup was terrible, with the selector switch hidden at the back at a bad angle and difficult to see. I decided to build a new cylinder case and put the selector switch on top of the case, where it will be easy to see and reach. Besides, the old case is literally coming apart at the joins because it was too small to hold the larger cylinders that were introduced after I purchased the boat.
I then purchased two new gas cylinders because there is no hope of the existing cylinders meeting Australian standards. I purchased them from Bunnings (sort of an Aussie Home Depot) knowing that I can exchange empty cylinders at any of their branches and any day of the week. They are 3.7 kg in size, which should be ample for coastal cruising.
I then purchased a nice piece of 18mm marine ply just large enough to do the job for $42. I took great care in designing which surface would nail into which in order to maximize the strength against the tendency of the cylinders to break out of the box. I joined the edges with Sikaflex construction adhesive (waterproof, paintable) held down with 40mm long galvanize nails. The photo shows the new case with the new cylinders and the regulator assembly in its future position. The holes at the sides will be for hooking "ocky" straps shown at the right. The case will be screwed into the lazarette floor.
The final photo shows the case ready for varnishing. I decided to treat the wood with several coats of Danish oil because it will penetrate the wood. Neither sunlight nor aesthetic beauty will be issues, given that the case will be hidden to one side of the lazarette.
The gas supply system represents probably the last dark and mysterious corner of Pachuca because over the years I have been forced to deal with just about every other aspect of the boat. I departed on the circumnavigation in 2008 knowing that I had not checked out the gas system and hoping for the best, placing great reliance on the gas detection and cutoff safety system. Fortunately I made it back to Fremantle safely with no line ruptures or regulator failure
Starting at the gas cylinders the components are as follows:
1. Hoses from cylinders to manual selector switch
2. The manual selector switch
3. The gas cutoff solenoid switch
4. The pressure reduction valve
5. The hose connecting to the copper gas line that supplies the galley
The first item was not critical since I had replaced those hoses in Hawaii about 4 years earlier. However, I had to assume that the other items dated from 1983 when the boat was built. I was particularly concerned with the last item, a fairly shabby looking flexible hose.
It took a bit of searching but my friends at Gas Components Australia at 1/4 Panama St, Canning Vale were able to replace everything but the solenoid switch. I can live (literally) with that solenoid switch because the only consequence of it failing would be the shutting off of the supply of gas into the lines.
 |
| New System in Foreground |
 |
| New Case |
 |
| Case Ready for Varnishing |
The photo tells the story, with the old items at the back and the new ones at the front. The black rectangular component in the back is the solenoid switch, that will fit between the selector switch and the new 2-stage regulator.
The old setup was terrible, with the selector switch hidden at the back at a bad angle and difficult to see. I decided to build a new cylinder case and put the selector switch on top of the case, where it will be easy to see and reach. Besides, the old case is literally coming apart at the joins because it was too small to hold the larger cylinders that were introduced after I purchased the boat.
I then purchased two new gas cylinders because there is no hope of the existing cylinders meeting Australian standards. I purchased them from Bunnings (sort of an Aussie Home Depot) knowing that I can exchange empty cylinders at any of their branches and any day of the week. They are 3.7 kg in size, which should be ample for coastal cruising.
I then purchased a nice piece of 18mm marine ply just large enough to do the job for $42. I took great care in designing which surface would nail into which in order to maximize the strength against the tendency of the cylinders to break out of the box. I joined the edges with Sikaflex construction adhesive (waterproof, paintable) held down with 40mm long galvanize nails. The photo shows the new case with the new cylinders and the regulator assembly in its future position. The holes at the sides will be for hooking "ocky" straps shown at the right. The case will be screwed into the lazarette floor.
The final photo shows the case ready for varnishing. I decided to treat the wood with several coats of Danish oil because it will penetrate the wood. Neither sunlight nor aesthetic beauty will be issues, given that the case will be hidden to one side of the lazarette.
The gas supply system represents probably the last dark and mysterious corner of Pachuca because over the years I have been forced to deal with just about every other aspect of the boat. I departed on the circumnavigation in 2008 knowing that I had not checked out the gas system and hoping for the best, placing great reliance on the gas detection and cutoff safety system. Fortunately I made it back to Fremantle safely with no line ruptures or regulator failure
Friday, December 26, 2014
New Surfaces
The plan that young Paul and I formulated last September to place stainless steel counter surfaces in the galley and head has progressed nicely.
The sheet metal worker produced the surfaces for only about $300. As I was paying him I told him that I was getting a bargain and he agreed. I told him that from now on I would see him for any stainless steel or aluminum work for the boat. I then pass on the observation to Paul that the further from the coast one gets the cheaper the boat work.
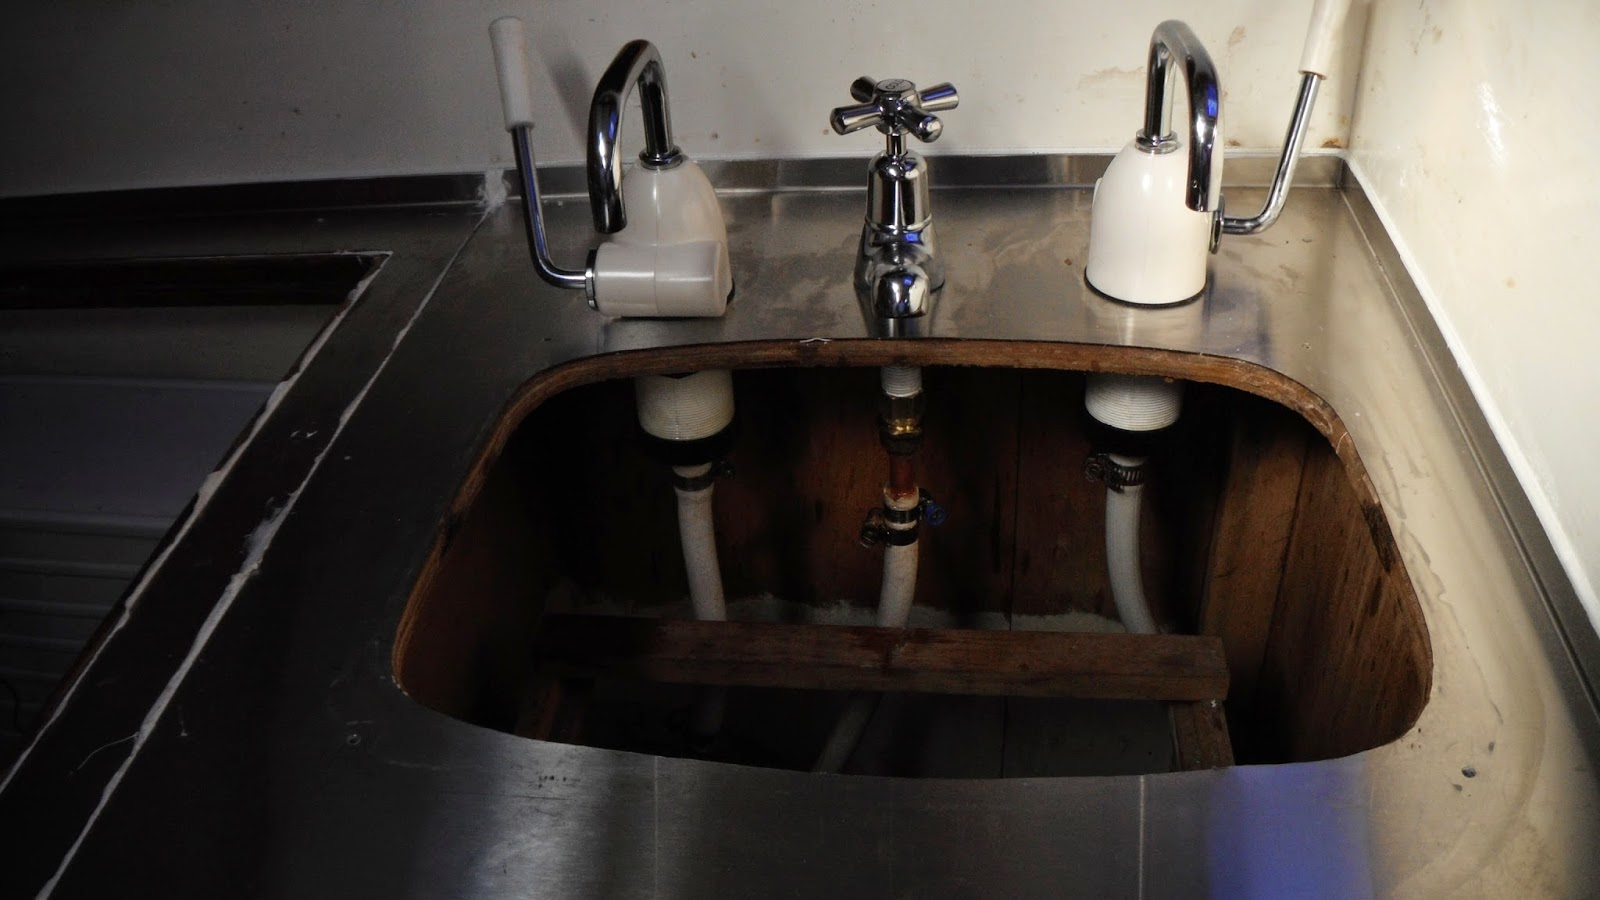
Paul and I spent close to two days fitting the pieces. He cut out the openings for the refrigerator and ice box openings, which was tricky operation because the metal would have to hug the thin wooden lips of the openings. By then I had new taps: two ordinary kitchen taps for pressure water, and three good quality hand pumps. There will be fresh and salt water hand pumps in the galley and a fresh water hand pump in the head.
I had decided to keep the old sinks, which I had taken home and brightened up using a buffing wheel on my angle grinder. We installed the sinks then it was left to me to install the taps on my time. Installing the sink before the taps turned out to be a mistake because I found it impossible to install the taps working up that narrow space between the sink and the bulkhead. I was forced to remove the galley sink, and the sooner the better before the Sikaflex 291 adhesive set hard. That turned out to be a difficult job because any undue pressure would result in bending the lip around the sink. I did the job by gently tapping a paint scraper along the lip of the sink then using gentle pressure.
After installing the taps I re bedded the sink using silicone sealant, which is gentler than 291, because I want to be able to remove the sink for future work on the taps.
 I then turned my attention to the marine stove. The connection was simple but the stove would not light. I found that the cylinder was empty so switched to the spare. Then I discovered that the manual gas valve at the galley was shut, but still the stove would not light. I could hear the solenoid clacking as normal which allowed the gas to flow, so I uncoupled the gas hose at the stove end and confirmed that no gas was flowing.
I eventually tracked the problem to the cylinder selector valve, which worked in one position but not the other. It was a relief to know that the stove, the main gas line, and the gas cutoff solenoid were OK. It was time that I gave that gas setup in the transom some attention - some hoses were looking a bit tatty, the pressure regulator was old when I purchased the boat, and too many things were welded together by corrosion - so I removed the regulator-solenoid-selector valve assembly and will visit the gas supply shop to try to get replacements for those items and three hoses.
I am enclosing photos of the galley, with the new stove, surfaces, and taps. Paul has the lids at his place for fitting of their stainless steel surfaces. There is also a photo of the gas components to be replaced.
The sheet metal worker produced the surfaces for only about $300. As I was paying him I told him that I was getting a bargain and he agreed. I told him that from now on I would see him for any stainless steel or aluminum work for the boat. I then pass on the observation to Paul that the further from the coast one gets the cheaper the boat work.
Paul and I spent close to two days fitting the pieces. He cut out the openings for the refrigerator and ice box openings, which was tricky operation because the metal would have to hug the thin wooden lips of the openings. By then I had new taps: two ordinary kitchen taps for pressure water, and three good quality hand pumps. There will be fresh and salt water hand pumps in the galley and a fresh water hand pump in the head.
 |
| Fresh Water Left, Salt Water Right |
 |
| New Stove in Position |
I had decided to keep the old sinks, which I had taken home and brightened up using a buffing wheel on my angle grinder. We installed the sinks then it was left to me to install the taps on my time. Installing the sink before the taps turned out to be a mistake because I found it impossible to install the taps working up that narrow space between the sink and the bulkhead. I was forced to remove the galley sink, and the sooner the better before the Sikaflex 291 adhesive set hard. That turned out to be a difficult job because any undue pressure would result in bending the lip around the sink. I did the job by gently tapping a paint scraper along the lip of the sink then using gentle pressure.
After installing the taps I re bedded the sink using silicone sealant, which is gentler than 291, because I want to be able to remove the sink for future work on the taps.
 |
| Sink in Head |
 |
| Hoses and Pressure Components to be Replaced |
I am enclosing photos of the galley, with the new stove, surfaces, and taps. Paul has the lids at his place for fitting of their stainless steel surfaces. There is also a photo of the gas components to be replaced.
Subscribe to:
Comments (Atom)