This blog began in late 2006 with the planning and preparation for a circumnavigation of the world in my 39-foot sail boat Pachuca. It then covered a successful 5-year circumnavigation that ended in April 2013. The blog now covers life with Pachuca back home in Australia.
Pachuca
Friday, July 31, 2009
Rigging Stuffup
This morning when I visited Dan at Port Townsend rigging he had a shock for me. When he removed the roller furler drum to replace it with the new one he found two deep scores around the headstay which had been caused by screws being placed too deep during the modification work that had been done in Honolulu. The headstay, less than three months old, was a total write-off.
If I had opted for the repair of the old drum rather than total replacement the problem would not have been detected and the forestay would have eventually failed without a doubt. Dan had offered the repair option in good faith trying to offer me a way to hold down costs but he said that he has learned a lesson from this experience.
The photo shows the scoring of the wire. After photograhing the section of wire I returned it to Dan so that he could put it into what he calls his "scary box" with which no doubt he will terrorize his customers.
Pachuca Back In The Water
I was given all of 20 minutes notice that Pachuca would be lowered into the water this morning. I was the only person on standby who was ready so I got the hoist. Pachuca had been on the hardstand for about 34 days.
Fortunately I was assigned a berth right on the fairway leading to the lift. There was a gentle wind from slightly starboard of the bow. When the slings freed me I asked the lift driver to pull my stern to his side, my starboard, with his boat hook. I then gave the boat a bit of reverse and the prop walk moved the stern to port. As I drifted back the wind would move the bow to port and I would give the boat a short burst of reverse to bring the stern to port. I got about 3 boat lengths downwind of the berth then I drove forward and eased into the berth on the port side of the fairway. Brenda was in position on the jetty, took my lines, and also reminded me to put out my fenders, which were inboard and all ready to be put over the side. The whole thing was calm and drama free.
Late in the afternoon I tried to connect to the power and found out that the jetty has 30-amp plugs whereas the hardstand area had 20-amp plugs. I will try to organize a 30-amp plug tomorrow.
Brenda in Seattle
Brenda's plane from Honolulu arrived one hour late but otherwise the trip went well. I had made my way to Sea-Tac airport through a sequence of two buses, one ferry, one train, and one more bus. On the return trip we cut out the train and with good connections made it from Seattle to Port Townsend in just under 5 hours. The duration was not a problem because the weather was good and the trip was a good touring experience for Brenda. I took the photo of Brenda on the ferry to Bainbridge Island, with the Seattle skyline in the background.
Tuesday, July 28, 2009
There is a God in Heaven
Doug fixed the refrigerator in the nick of time before the beginning of the biggest heat wave Seattle has had in many years, if not ever. The temperature has been running in the high 90's F. The prediction tomorrow is 97 F. That's pretty hot for a city at latitude 48 N. I've been surviving with a fridge full of ice cold Heineken beer. Hallelujah!
Today I rearranged the boat and cleaned it up in anticipation of the arrival of Brenda who will land at Sea-Tac airport tomorrow (29 July) at 10 PM. I will leave tomorrow morning to make the bus-ferry-bus trip to the airport. We will return the following day by the same route. Shannon at Port Townsend Rigging did a great job of finding the bus schedules for me.
This morning BUMS put that extra coat of antifouling that I requested.
Arnold dropped by to pick up his motorcycle seat that had been upholstered by Sea Bear Canvas above the rigger's premises. They did a brilliant job and Arnold was very pleased.
I am on standby for having Pachuca returned to the water from Friday onwards. Joe from BUMS says that it will probably be on Friday. There is a good chance that the lower extrusion will arrive and Dan will be able to put together the forestay before the lift. Otherwise the boat will go into the water with two halyards holding up the mast in place of the forestay.
With luck the diesel maintenance will be done on Monday or Tuesday of next week and Pachuca will be cleared for sailing at midweek.
Saturday, July 25, 2009
Meetings
On Thursday I met with Lisa and discussed the remedy for the Profurl system. The choice was whether to repair the existing drum or replace it with a slightly more robust one. In either case a new lower extrusion was required. Dan said that he could repair the drum with confidence that it would get me back to Australia OK. However, after looking at the stripped threads and extra holes drilled in an attempt to keep screws in I realized that I had had enough of that drum and elected to get a new replacement. That will add $1,000 to the roller furler cost.
On Friday I visited Kelsey to discuss the proposed sail repairs. We went through the proposals line by line. The big change was that we've taken the replacement of the UV edging on the jib off the table, saving about $1300. If I expect to be in a tropical port for more than a few weeks I'll drop the jib and store it below to protect it from the sun. I had the bright idea of dropping off the jib next week and sailing the San Juans with one of my spare jibs, the light one Kelsey was delighted because it allows them to work while I am away. I am to be back by 4 September to hand in the mainsail for its repairs, which will require about 3 working days.
Incidentally, much of the chafing damage to the jib was exacerbated by the loose headstay that I ran with between Australia and New Zealand. Between damage to the jib and the roller drum that problem has cost me plenty. Another hard earned lesson for me.
Refrigerator Working
Doug Roth visited the boat for the 5th time and found that the refrigerator tubing had no more leaks. He evacated the gas from the tube with the pump shown in the photo then charged up the unit with Freon 12. Two hours later I had an ice cold beer from the refrigerator. For Quality Assurance reasons I soon had a second cold beer. I then decided to mop up some water at the bottom of the refrigerator compartment and found that it was covered with a layer of ice. Just before Arnold arrived I had a third cold beer under the well established principle of longtitudinal camparative consistency analysis (translation: I felt like another beer). Doug will return on Monday to make sure that all is well and I settle with him. Doug is the old fashioned we'll fix it no matter what kind of guy, which is in sharp contrast to the swap jockeys that prevail today. He never gave up. Monday will represent his sixth trip to the boat.
Last night after dinner I opened the package containing the new Bosch temperature sensor for the SABB diesel. It appeared to be the correct part. Arnold did some research on my behalf and this morning I ordered a new cooling fan which I will set up to evacuate the heat from around the refrigerator compressor and coils. I also ordered an up-market 12v-120v 300 watt inverter that puts out a true sine wave.
This morning we purchased a 10-ft pressure treated plank at Home Depot for under $10.00. We had it cut in two and I will stow them below for use as fenders when tied up to pylons.
Wednesday, July 22, 2009
Deck Work Finished
Today I reinstalled the traveller. It is the original track with new blocks that will give me more purchase. I got everything started then got help from Anders of Port Townsend Rigging with tightening the nuts. He worked above with a screw driver while I worked below with a wrench. For once I got sealant just right because a thin bead of the material was squeezed out from both sides of the track. Later I fitted new lines.
I also worked with Dan and Lisa on the specification for a new mainsheet. I had found that the sheet was too short to allow me to push the boom almost abeam when running downwind. No wonder. We worked out that I needed 90 feet of sheet and my existing one was only 54 ft long.
Yesterday I installed the rope organizer and the padeyes for anchoring down the running back stays when they are not in use. The organizers are on black plastic-like blocks similar to the "Star Board" on which we bedded the stanchions in Hawaii. I would have preferred white blocks but black they are.
Yesterday I got a call from the sail maker and was asked to visit for a face-to-face on their findings. Lisa loaned me the company pickup truck and soon I was at the sail maker's loft for what turned out to be a one hour visit.
We went through their recommendations on the mainsail step by step and they all made sense. The total cost was just over $3,000. Much of that work would be to bolster the sail up and give it better protection rather than outright repairs. Then we turned our attention to the jib which I had almost not brought in because it was only one year old and seemed OK to me. The recommendations on the jib added up to just over $2,000. A total of over $5,000 was too rich for my blood so we went through the process again identifiying only the essential items. The total was reduced to just over $3,000. They could not complete the work before 17 August which was not acceptable to me so we agreed that I would return the sails on the last day of August.
The sail loft has an extremely good reputation for producing offshore sails that last 60,000 miles. Looking back, they were attempting to send me back out with sails to their high standard. However, I paid $5550 AUD, about $4440 USD for the laminated jib one year ago, a technology that the sail loft does not have. I paid $5709 AUD , about $4567 USD for the mainsail in Aug 2005. It didn't make sense to me to invest more money in the sails than I had paid for either one of them.
Today I put the mainsail back up and had a close look at it as I handled it. It didn't look that bad to me.
Sunday, July 19, 2009
This is Sunday and I am on a break visiting Arnold and Sandra.
Yesterday I sanded the four round winch platforms then painted them with three coats of 2-pack paint. The top photo shows the wooden toppings that I removed. In the second photo you can see the six filled-in holes in the near platform before the painting. The four holes not filled in are for the padeyes used to stow the running backstays. The thired photo shows the four painted platforms.
I also polished the stainless steel bow protection plate.
The lower photo is of a Hunter 31 that caught my eye. The boat seems to have a lot of freeboard and very little keel. I'm sure that the Hunter 31 is a fine boat but I'm wondering how much sail it can carry.
Friday, July 17, 2009
Progress Report
Yesterday was very productive for me. Dan at Port Townsend Rigging sent one of his people to Pachuca to set me up for filling in the 24 holes of the winch platforms in front of the cabin. He brought everything required including a mask for me. He showed me the technique of reaming out the top of the holes with a countersink bit to give better support to the filler material. He then mixed the epoxy and showed me something else that I had not seen before: using a plastic injector for inserting the epoxy from the bottom of the hole up. He then left me to it. I filled in the 24 holes then filled in several other areas, in particular the four screw holes over the head that had been filled with silicone sealant until then. I then mixed another batch of epoxy and made the repairs inside the cabin ceiling which I believe will stop the leaks on the starboard side.
In the afternoon I had a go at tightening the headstay. Jeff Compton had showed me how to do it in Honolulu but I must have not been paying enough attention because I could not get the drum to go up. Dan told me how to do it. He says that one of the good things about Profurl is that you can get to the turnbuckle to adjust the headstay while the sail is still on the roller. Anyway, I eased the backstay and tightened the headstay turnbuckle three revolutions. I then tightened the backstay and after that tightened the inner forestay to give the mast a slight bend. I can say that I now have a "feel" of how to go about tuning my standing rigging, which is about time given that I've sailed 1/3 of the way around the world.
This morning I found that I had to mix up a small batch of epoxy to tidy up some flaws in yesterdy's filling work. I then check the patch up work in the ceiling and it looked very good. On that basis I put the two ceiling panels back up, pleased to note that this marked the start of putting the boat back together again.
I saw Joe at BUMS and asked him about the antifouling he is using on Pachuca. He's using the premium stuff which he says is 70% copper. I didn't think that it was possible to have than much copper in antifouling but he insisted that it was seven zero percent copper. If it is that strong then the third coat should surely see me through to Australia if the boat doesn't sink from the sheer weight of the copper.
Arnold and Sandra came by with their visitors Willie and Jacky, who are about to embark on one of those coastal cruises to Alaska. Willie came on board and I gave him a tour of my shambolic boat. After they left I used the Dremel tool that Arnold had brought to clean up the end of a toggle pin that had been giving me trouble.
Tomorrow is Saturday. I'll put two coats of paint on the repairs that I made on the deck then visit Arnold and Sandra for the weekend. At this point I am at the mercy of Dan and his reception of equipment that he has ordered for Pachuca.
So the things left to be done are:
- Third coat of antifouling (to be done early next week by BUMS)
- Rigging work (by the end of the week hopefully)
- Return of my head and main sails from the sailmaker (promised by Friday)
- Engine maintenance (after boat is in the water)
Once the boat is in the water and I have access to running water again I'll have to spend at least half a day cleaning the boat from stem to stern.
The top photo shows the leak repair work in the ceiling.
The second photo shows a treat that I got for Pachuca, even though she has cost me a lot of sweat, worry, and money: a digital temperature and humidity guage.
Wednesday, July 15, 2009
Small Jobs
I spent literally hours cleaning the places where I had removed fittings. Scraping every bit of sealant off in preparation for filling in and painting was a tedious and slow job.
Dan passed by and offered to lend me the pickup to take the headsail to the sailmaker's. I replied that it was less than a year old and that it was OK but after some reflection I realized that I only thought that it was OK. Maybe the sail maker would spot and correct a problem before it got serious. So I took the sail to the loft this afternoon and two of the women helped me to drag it inside. Gee I like that place. Maybe I can put on some drag and apply for a job.
I removed the jib halyard and will hand it in tomorrow for a replacement.
I had a chat with Joe at BUMS about the antifouling. I told him that I accepted that their antifouling was good for 2 years, but that would be here at latitude 48. I had 20 months of sailing ahead of me and much of it would be in the tropics. It seemed to me that a third coat of antifouling could make the difference in getting me to Australia without the need for another haulout. He agreed, so next week he will give the hull a light sanding and put on another coat of antifouling.
Tuesday, July 14, 2009
Rigging and Sails
I started the morning by removing the organizer blocks from the cabin top. Fortunately Dan came by and saved me from big task of removing the foremost cabin ceiling panel by suggesting that I pry open the aft edge only and reach in with a wrench to undo the nuts. That worked fine.
After handing in the cleaned-up traveller and deck gear I turned my attention to dropping the mainsail. Dan and Lisa were too busy to drive the sail to the loft so they gave me directions and the keys to the business Toyota pickup truck. I told them that I would be driving with a Western Australia driver's license but that it was my understanding that there was a reciprocal agreement between the US and Australia on mutual recognition of each other's driver's license. Lisa overcame her doubts and gave the OK then I wondered out loud why everyone drove on the wrong side of the road and had their steering wheels on the wrong side of the car. The pickup had a floor manual shift and thanks to the 25 years with my VW Beetle I had no problem.
The loft was very interesting. There were six people at work and they were all women. The place was cheerful with great music coming from somewhere. I asked about the building and it had been a US Coast Guard armory many years ago. The brief regarding the mainsail was simple: check it out to a standard for rounding the Horn and sailing back to Australia.
I returned to the boat and decided to drop the jib so that I could recover the halyard for a replacement. The wind speed was 3-4 knots coming from directly ahead which was good for rolling out the entire jib before dropping it. I rolled it out OK and dropped it but 2/3 of the way down the system jammed up and I could not get the jib either up or down. Fortunately the rigger shop was still open and soon Lisa came over for a look. She noticed that some of the screws holding down the extrusions (a series of tubes going up the length of the headstay) had backed out and were standing proud.
Soon Dan was up doing his Spider Man act and unshackled the jib to let it drop. The using a rubber hammer he loosened things up and screwed down the proud screws. Everything was safe and soon he will bed the screws with Loctite after perhaps reinstalling all of the extrusions.
What can I say? This was supposed to have all been fixed in Hawaii and I thank my lucky stars that we found the problem at the right place and the right time. If something like this were to happen at sea I'm not sure what I would do.
In the middle of the day Doug Roth came by to gas up the refrigerator. Unfortunately there was a third leak! It was in that same area where the tubing passed through the wall. Doug was undaunted. He sanded the entire area and epoxied the that entire section of tubing. He'll be back.
Monday, July 13, 2009
Busy Monday
The first thing I did this morning was to investigate the possibility of moving two of the batteries in the rear of the boat so that I could get good access to the stern of the boat below the cockpit to look for possible sources of water leaks. I removed the wooden clamp holding them down and moved one of the batteries around go gauge its weight. It was seriously heavy. I managed to slide myself on top of the batteries to get a good look at the area in the back with a strong light. Everything was dry and the hosing appeared to be in order. The design and construction of the rudder post housing seemed to prevent any possibility of leaks. There was some minor leakage from the cockpit around the binnacle into the lower area. I felt the two clamps at the top end of the muffler and they were secure.
It did not make sense to me to go to the effort (and risk) of removing the batteries for a closer while I wasn't sure that there was a leak in that area. Now that I knew that I could squeeze in far enough for a good look I decided to inspect the area when when we are sailing hard to windward.
I've included a photo of the four batteries in the stern. The two lower ones are the original Delkor batteries for starting the engine. The two upper ones are two of the four gel batteries installed in Opua, New Zealand. That black pad on the side of the battery with two attached wires is the temperature sensor, required because gel batteries can overheat and burn.
After that I removed part of the ceiling on the starboard side of the cabin and exposed the area to be treated for leaks. The problem appears to be identical to that on the port side which Arnold and I successfully treated in Hawaii. I'll do the same fix with epoxy and am fairly optimistic about the result.
Then Dan from Port Townsend Rigging paid his visit and my task list was significantly changed. The good news was that he thinks that my rigging is OK. The age of the rigging (about 4 years) and the mileage on them (8000 nm perhaps?) is well below the expected life of the rig. I attribute to the failure of my headstay to excessive flexing because it was allowed to get too loose. I cannot explain the corrosion failure of the inner forestay.
Dan then turned his attention to the various deck fittings with the thoroughness that I have come to expect. Many of my blocks are undersized. Three of them have sheaves for wire and not rope and must be replaced. The blocks on the traveller are in particularly bad shape. I knew this when I left Fremantle but was too busy to take the time to lift the track off to get access to the blocks.
The four wooden platforms on the cabin to accommodate winches for serious ocean racing were cracked and would not last much longer so it was agreed that I would remove them and the two wooden bases for the stainless steel manager of the lines between the mast and cockpit to be replaced with synthetic material.
The attachment of the topmost slide of the mainsail was badly frayed and would have to be repaired by a sailmaker. I would drop the sail, pack it, and lower it to Dan who would take it to the sailmaker in his vehicle.
We agreed that a new topping lift arrangement would be set up using an external sheave at the top of the mast and the freed internal sheave would be used for a second halyard. This would act as a backup for the main halyard and would allow me to set up the trysail complete with its own halyard and ready to go up at short notice.
I would drop the headsail and remove the halyard for inspection and possible replacement.
Changes would be made to the boom vang. A new attachment would be made on the mast to replace the awkward one at the base of the mast. Also, one of the ropes would be replaced with spectra or similar standard.
Dan would try to find a short section of track compatible to what is already up the front of the mast in order to carry the spinnaker pole at the front of the mast instead of on the deck.
The first thing I did after Dan's visit was to remove the traveller. I have enclosed photos of the removed traveller and a closeup showing the pitiful state of its sheaves, this on a boat trying to circumnavigate the world.
Then I removed the four wood winch bases on the cabin. The photo shows the first one that I removed. You can see that the original base was of fiberglass molded on the deck. The wooden bases were put on top of the fiberglass bases to accommodate bigger winches. The plan is to clean off the fiberglass, fill in the holes, then sand the area smooth.
This will extend my hardstand time well into next week.
Oh, and I got word on that gear that I need for my port spinnaker winch. The good news is that the part is available. The bad news is that it will cost $237 USD.
Sunday, July 12, 2009
Boomer Encounter
Last week, returning from Port Townsend, I had to wait at the Hood Canal bridge while a span was opened for a boomer submarine from Subase Bangor.
The first photo shows the entire sub; the second photo shows several of the crew on the conning tower (note that one is looking at me with binoculars); the clip shows the sub moving past the bridge.
If you want to see one of the subs, come to Washington State. Once the subs submerge off the coast, they stay submerged.
--
Thursday, July 9, 2009
Refrigerator
I forgot to mention that the man had a look at the refregerator yesterday. He said that there was absolutely no pressure in the system which was a bad sign. He then injected some gas and immediately I heard a hiss from the part of the unit that is inside the food section. Not good, he said. He found a pin-hole leak, sanded the area to bare metal, then patched the aluminum with epoxy. He expects to return tomorrow to see if the patch held. I could be lucky on this one.
... Did I mention that the new main halyard cost me over $340.00? Yep, 115 ft at $2.99 per foot (plus tax). That is about the same price as 3/8" chain.
Chain Plates Final
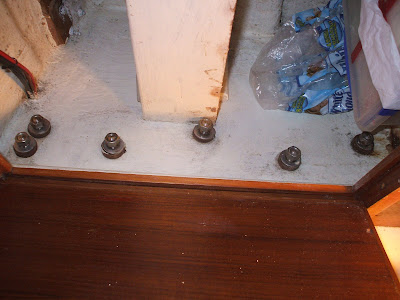
Today I reinstalled both chain plates. Dan the rigger recommended using 3M 5200 as a sealant because it has stronger adhesive qualities, is stronger, etc. After thinking about it I decided to use 3M 4000 which is a medium strength adhesive which is suitable for fittings above or below the water line. I just did not want to put either the boat or a future owner through the ordeal of trying to loosen those chain plates if they are glued to stay. It is impossible to hammer the chain plates from below and to pry them from the top would involve damaging that section of the deck. As you can see, I'm pretty liberal with the sealant. The green tape on the shrouds was to mark the original position of the turnbuckles.
I worked to the company new neighbors: a pair of charming fishing boats named Petrel (from Oregon) and Neper (from Poulsbo, WA)
Wednesday, July 8, 2009
Chain Plates OK
The rigger has checked out the chain plates and has declared them to be OK. Phew! That's $2,000 that I don't have to spend. I plan to reinstall them tomorrow.
Dan the rigger will visit Pachuca tomorrow to discuss other possible work. At this point he does not seem to be concerned with any part of my rig. I'll know more tomorrow.
Tuesday, July 7, 2009
Hull Work Completed
Almost.
BUMS (Bottoms Up Marine Services) has antifouled the hull and polished above the waterline. They brought the propeller and shaft back to the bare metal and put a coating on it that is supposed to be better than antifouling. The antifouling has a high copper content that is supposed to last for two years. (It is not allowed in Australia.)
Starboard Chain Plate
Monday, July 6, 2009
Chain Plate
Arnold brought me back to the boat last night so that I could get an early start this Monday morning.
The first thing I did was to replace the faulty cockpit switch that controls the electric anchor winch. Arnold and I had managed to find a replacement at his local West Marine. The entire system is now working well and the wiring at the bow has been upgraded to hopefully give me years of trouble-free service.
Then I replaced a shackle joining two lengths of 3/8" chain on my spare rode with a proper joiner that comes in two halves and is made one by hammering four metal pins. I can't be sure that the joiner is as strong as an ordinary link as the man said, but it does look strong enough. The two halves will stay together because I've flattened out the four pins and the forces on the joiner act to keep the halves together. It passes through the windlass gypsy just fine. I will probably use one of those joiners to add a 22m length to my primary rode to yield 60 m of all-chain rode.
How do you remove a chain plate when you've never done it before? Well, you get started and hope for the best. I began work on the port chain plate at noon. First I removed the surrounding caulking on deck. Then I removed a section of the cabin ceiling to expose the entry through the deck. After that I started the process of removing the three shrouds from the chain plate. I used a spinnaker halyard to secure the mast to the port side then fixed the shrouds one at a time through shackles that I had put on the toe rail. For the D1 and D2 shrouds I used cord, but for the cap shroud I used all metal. Then I spent literally hours removing 11 bolts from the chain plate. Getting the nuts off was easy. The hard part was unscrewing the bolts through the wood one partial turn at a time. At 6 PM I had all of the bolts removed and my plan was to face the task of removing the chain plate the next morning. However, I decided to assess the difficulty of the problem and within 20 minutes I had the chain plate out.
I was extremely pleased to see that the chain plate does not appear to have any serious corrosion. I will clean it up in the morning and take it to Dan the rigger for a professional assessment. One of the tricks of the trade is to use acid to highlight fractures. ... I am convinced that the stainless steel use decades ago - 1983 in this case - is superior to the dodgy stuff we get today.
Tomorrow I'll probably remove the starboard chain plate. I'm confident that it will be OK too but I want to rebed both chain plates. Dan talked about using epoxy for rebedding and resealing. However, I am inclined to use something softer, such as Sikaflex or 3M 4000. The key to my removing the chain plate so easily today was that it had been bedded with soft material. I do not want to use a strong adhesive and leave a big problem later on for myself or a future owner.
When I see Dan we will decide on a priority list of work on the boat. I've already discussed with him the possibility of extending the track at the front of the mast so for storage and deployment of the spinnaker pole. It would be great to get the spinnaker pole off the deck. We might do something about various cars and fittings which have seen better days.
I am looking forward to sailing out of here knowing that my chain plates and rigging are reliable, with no more rain water dribbling down the chain plate.
4th of July
Arnold picked me up on Friday afternoon and I spent the 4th of July at his home with Sandra, Denver the Dog, and the two cats.
We went to Kingston's 4th of July parade which I enjoyed immensely because it lived up to my expectations of small town America complete with town major and cops, fire engines, scouts, pubescent beauty queens on vintage cars, high school band, excited children, pet dogs, etc.
That evening we returned to the waterfront and enjoyed fireworks on both sides of us and across the water from Seattle to the north as far as the eye could see.
Enclosed are a selection of photos. The line of 5 sheriff staff bearing the flags opened the parade.
Subscribe to:
Posts (Atom)
Blog Archive
-
▼
2009
(376)
-
▼
July
(24)
- Rigging Stuffup
- Pachuca Back In The Water
- Brenda in Seattle
- There is a God in Heaven
- Meetings
- Refrigerator Working
- Deck Work Finished
- This is Sunday and I am on a break visiting Arnold...
- Progress Report
- Small Jobs
- Rigging and Sails
- Busy Monday
- Boomer Encounter
- Refrigerator
- Chain Plates Final
- Chain Plates OK
- Hull Work Completed
- Starboard Chain Plate
- Chain Plate
- 4th of July
- Salt Water Inlet, Rigger, Windlass Switch
- Pump story
- Working Chaos
- Hosing and Windlass Foot Switch
-
▼
July
(24)