This blog began in late 2006 with the planning and preparation for a circumnavigation of the world in my 39-foot sail boat Pachuca. It then covered a successful 5-year circumnavigation that ended in April 2013. The blog now covers life with Pachuca back home in Australia.

Pachuca

Pachuca
Pachuca in Port Angeles, WA USA

Monday, January 14, 2019

Mast Reassembly Begins

By 8.30 AM on Monday Mike Foss the painter, Steve Hartley from Taskers, Bruce and I  began loading the painted mast, stump, boom, and spreaders.  Before setting off with the load for the FSC Works area I gave a final thanks to Mike his outstanding paint work.
Result  of Bruce's filling and sanding corroded areas

Bruce and Steve installing the mast steps

We unloaded the pieces next to the boat and at about 10.30 Steve the rigger from Boating Hardware began the task of reassembling the mast with the assistance of Bruce.

The work went well and by the end of the day all of the mast steps (which had been powder coated) had been pop riveted on (four stainless steel pop rivets per step) and work had begun on the other mast fittings.  During the day I had visited Yacht Grot and purchased a new combination steaming and deck light.

I spent my day finishing the removal of the silicone sealant from around the cabin window openings then sanding the remaining parts of the bilge to be repainted.

We expect to receive the new windows and repaired water tank within the next two day.

Friday, January 11, 2019

Mast Painted

It was a big week centered around the painting of the mast (including the mast stump and boom).

I telephoned Bruce early on Monday morning and told him that I suspected a leak in the port water tank.  With the tank full of water I was getting a slow but steady seepage of water from the aft starboard corner of the tank even though several checks confirmed that all of the hose connections were tight and dry.  Bruce left his work on the mast and paid an early visit to the boat and confirmed the leak.  He telephoned Sheet Metal Fabrication of Willard Street Bibra Lake and at 2 PM we got a visit from two representatives of the company who confirmed that the tank was indeed leaking.  I told Ian, one of the reps, that I thought that both tanks had been pressure tested and he assured me that they had been pressure tested three times at 3 atmospheres.  (So why the leak?  Never mind. The tanks have been well made at a good price and these things happen.) After that visit I drained the tank and disconnected all hoses and the next morning Bruce helped me remove the tank and take it down to his car. 

On Wednesday Roger from Yacht Grot left a message that a part for the manual water pump in the head had arrived and by Friday all plumbing had been completed and it as now a matter of connecting the port tank when it arrived in the coming week and testing the result.

Replacement light at right
I got an unexpected visit from Greg Hansen offering to replace the steerage light with one that he had salvaged from another boat.  He knew that I was not happy with the huge amount of heat produced existing LED light, which was a replacement for the original which had failed after only a few weeks of service.  I was delighted with the "new" light which appears to be superior in every way, and thanked Greg for thinking of me.

At 8 AM on Monday Steve Hartley from Taskers arrived with his mast trailer and the three of us loaded the mast, stump and boom and took them to Mike at nearby premises on Brockman Place for preparation and painting.  Bruce spent much of the next two days finishing working with Mike to finish the sanding and painting the surfaces with epoxy primer. I visited the site at 4.30 PM on Tuesday to see the mast ready for painting and looking very good.
Devcon filler, ready for sanding

Filled area after sanding

On Wednesday morning Bruce telephoned me from Gary Martin's "Boat Paints" to tell me that they were doing a last minute switch to a new Jotun paint that had just become available.   Bruce and I visited Mike at 4 PM after he had laid down the second top coat of gloss and I was amazed at the quality of the result.  Mike said that the paint would get glossier as the thinner dried and it would be even glossier after the third coat.  He spoke highly of new Jotun paint and told me that it was one of the best painting results he had ever had. 

For the record, this is my understanding of the paint process:

1. All surfaces were sand blasted by Bruce, exposing many pits where corrosion  had been dug out as only sand blasting can do.
2. All corrosion pits were filled with Devcon aluminium 2-part epoxy putty, and the filling was sanded to yield smooth surfaces.
3. Three coats of primer were sprayed using four liters of International "Interprotect" 2-pack epoxy high build primer.
4. Three top coats were sprayed using 2.5 liters of the new Jotun "Yachting Extra Gloss", a high gloss acrylic polyurethane paint in the color "Auria White".
Mast  being loaded on trailer

Steve Hartley and Bruce tying down the mast

Mast at Mile's for painting

Thinner No. 10 that is optimized for a temperature of 28C was selected for use in  the expected mild temperatures in the mid-20's.

The first two gloss coats were reduced with 30% thinner, and the final coat was reduced with 40% thinner to yield maximum gloss.

The accompanying photos were taken while the second coat was drying.

We all agreed that the mast looks brand new.   Bruce pointed out that masts as sturdy as Pachuca's - large sections with thick walls - are simply not available any more.  The way I figure it the mast is probably better than new because the new epoxy primers and polyurethane paints are far superior to anything available when the boat was built in 1983. 

And I must comment on the outstanding job that Bruce Diggins of Albatross Marine has done to achieve this result.  Back in December he organized the right people with the right equipment and skills and scheduled it all with the precision of a military operation. ... And the military operation continues.  On Monday at 0830 the mast will be returned to the FSC boat yard and at 0930 Steve the rigger will begin the laborious task of reassembling the mast. 

On Thursday we found time to begin the task of replacing Pachuca's windows.  When I purchased Pachuca she had the original  perspex windows that were so clouded up that looking through them must have been like trying to distinguish forms through heavy eye cataracts - they let the light through but not much else. 

Bruce declared the first window that we removed to be the worst he had ever seen.  After we removed the many small screws around the perimeter we found using a putty knife to slice through the silicone sealant caused the screw line to fall apart and we were forced to tape all of the perimeters before prying the windows loose.  Keeping the windows intact was important because the plan was to clamp each perspex window to the underlying polycarbonate material then make an exact replica by cutting round the perimeter of the old window and drilling through the existing screw holes.
Mast after 2 of 3 coats

Boom, with Mike and Bruce in background

Bruce took the first window to the fabricator who agreed that the plan would work and would order the material as soon as he had all six of the old windows.  The fabricator found it hard to believe that the crumbling windows had not been leaking but it is true that after Arnold, Reg and I re glazed them in Port Lincoln in 2008 I had no leaks through several storms and countless gales.  Having said that,  the forward port window was in particularly bad shape, no doubt badly stressed from that heavy wave off the coast of Brazil that knocked the boat over, bending two of my port stanchions. 

Yesterday we removed the remaining 5 windows and Bruce took them to the shop.  I then spent two hours removing the silicone sealant from around the three starboard window openings and Bruce would clean around the port window openings  today (Saturday).

The existing 3mm perspex material will be replaced with 6mm polycarbonate material and the windows will be beveled.

The interesting thing is that replacing the windows has been little more than an afterthought.  When Bruce presented the new polycarbonate companionway sliding door a month ago he commented that it would be nice to also replace the boat's windows.  One look through at the ocean through the new door convinced me try to find time to replace the windows.
Bruce removing window

Port window in seriously bad condition


We expect to have the new windows early in the coming week and hopefully will have them installed by next Friday.


Saturday, January 5, 2019

Mast and Plumbing

Bruce has been focusing on preparing the mast, stump, and boom for painting.  We moved the pieces into a vacant shed over the Christmas holidays and Bruce got to work with his two sand blasters which proved perfect for the job. During the process he removed corrosion that could have been done only by blasting, and he uncovered a crack in one of the small braces of the mast stump.  I am not too worried about that crack because the welding had not been done on both sides of the material and Pachuca probably sailed around the world with that flaw.  However, Bruce plans to have the crack welded up properly.
Worst area of corrosion before filling and fairing

Small crack on brace join


The corrosion was worst wherever there was a stainless steel or other fitting covering the aluminium, and although one section had pits almost 3 mm deep we so little structural compromise because the mast and its accompanying sections have very thick walls by contemporary standards - more than 5mm - and Bruce would be filling all of the corroded sections with an ultra expensive ($140 for 0.5 Kg) aluminium putty called "Devcon" which would go rock hard and probably be stronger than the original. He then completed most of the sanding then handed over the remaining few hours of that work to a colleague and set off for the south coast with his wife for a well earned 5-day break. 
No welding on the inner side of the brace join

I spent an inordinate amount of time plumbing the water tanks. I ran short by about 5 meters of the good quality half-inch potable water hosing that Bruce had purchased at Henderson Hose and Fittings and the replacement that I purchased at a local chandlery was simply not adequate.  The problem was that the reinforcing was too light and the hosing crimped very easily, which is a problem when one is force to make fairly tight bends.  Another chandlery offered the same inferior hose and a third chandlery had no half inch hosing at all. I returned to Henderson Hose after they resumed business after the holidays and they were out of the hosing, so I walked away with half-inch plastic hosing that is rated "food grade" and will hopefully not produce that "hose taste" one will get from a garden hose, particularly since I will be using very little of it.

I worked on New Years Eve and New Years Day then returned on 4 Jan and by midday 5 Jan had most  of the work done, including the siting and connection of the pressure pump - in fact all of the work except that I must replace a section of hose that crimped at  the end.

The next stage will be to partially fill the tanks to test for leaks and the functioning of the tank selector valve, pressure pump, and manual pumps.  If that goes well I will completely fill the tanks and ensure that there are no leaks.  I will then siphon the water out of the tanks and flush fresh water through the system to remove any residue from the fabrication of the tanks.
Plumbing on starboard side.  Tank selector valve at left.  Tank at right.  Battery will sit above the hosing.

Plumbing on port side.  Tee piece supplies water to manual tap and pressure pump. Tank at left.

Tomorrow, Monday the 7th, we will begin a well-planned operation to move the mast to the painter where the aluminium will be etched with acid the spray painting will begin almost immediately.

Sunday, December 23, 2018

Fuel Gauge Working

We had problems with the fuel gauge.

I filled the fuel tank, noting the reading of the fuel gauge at every 20 liters.  The filler overflowed at an unexpectedly low 125 liters yet the gauge remained stuck at one half tank.  I retrieved the instructions from my garage over the weekend and last Monday Greg Hansen used the instructions to verify that the gauge was working correctly and the sender in the tank had an electrical resistance consistent with a half full tank, so the problem was definitely in the sender.
Fuel Sender

Bruce and I removed the sender and found things that I didn't like.  I wasn't too happy with the design of the sender, with the float at the end of a long thin stainless steel arm which I considered susceptible to metal fatigue in a rolling sea where the fuel would be sloshing from side to side.  The holes for fixing the sender onto the tank had been drilled so far from the center that they broke the perimeter of the plate,which didn't look right to me.  The drill holes in the tank were very poorly centered and finally, screws of two different lengths had been used to fix the sender to the tank, something that I considered sloppy and amateurish.  (I purchased a new set of screws.)

After measuring the length of the float arm we concluded that it was hitting the side of the tank and attempted to rotate the sender 180 degrees but we found to our surprise that the mounting holes would not align properly.  At that point we gave up and telephoned the Rob of Sheet Metal Fabrications for help, and to his credited he visited the boat the next morning.

Holes drilled at the perimeter of sender flange
Tank holes off center
Rob assured us that the design of the sender was the standard one that he installed on most boats without ever having experienced a failure.  The drill holes around the mounting plate of the sender were as delivered by the manufacturer.  But he did concede that the holes in the tank could have been better centered.


Success!

He attempted to install the sender 180 degrees from the original as we had tried but ran into the same problem of hole alignment.  He then nipped about 10mm from the length of the float arm and fit the sender in its original orientation.  To our disappointment the sender still reported 1/2 tank so he removed the sender and saw that the wiring which was now excessively long after having cut down the unit to fit my tank was tangled around the float arm.  He tied off the excess wire with a plastic tie and installed the float with no further difficulty.  The excess wiring had  been the problem all along and had cost Bruce and me hours of work, not to mention the visit from the the installer

Re finishing the shower duck board
My homework for last weekend had been to clean, sand, and re varnish the shower recess duck board with Everdure 2-part epoxy wood primer from International Paints.  Belt sanding the outside of the piece was easy, but the120 internal holes were a big problem and I had to be satisfied with a good clean out. of those holes with no sanding.  I hung the piece in the carport and laid down two coats in the holes, four coats underneath, and five coats on the walking surface.  This was a relatively fast process because Everdure can be laid down "wet on wet" with as little as 6 minutes between coats.

I also spent about 8 hours over two days painting the bilge.

By the end of the week I had laid down the required two coats on most of the bilge until I had run out of paint. Bruce painted the rest of the bilge on the following Monday morning. That would put us in position for plumbing the water tanks and finally, after months of accident prone walking along the bilge, re installing the cabin flooring.   The section of the bilge forward of the bulkhead was painted with Hempel 1-part Multicoat Primer/Topcoat, an excellent product that is sadly no longer available.  For the main part of the bilge I used 1-part "Bilgekote" by International Paints.
Bilge Painted

We also put one of the powder-coated toe rails on the deck to see how the color would blend in with the rest of the boat.  I had chosen the color with the intention of changing the deck color from light blue to more of a beige color.  From the top of the boat that would look very good but after considering the color from the perspective of a side view of the boat I agreed that it would be best to retain the light blue deck color.  Fortunately the toe rails will look OK, partly because they will blend in with the generous amount of teak on the deck.
Toe Rail color check

Toe rail at port gunwale

Monday, December 17, 2018

Engine Ready etc

It was a week of slower pace because Bruce was tied up for several days attending to a catamaran in urgent need of attention and I used my time doing small but useful jobs.

I started the week by installing the boat's gas cylinders.  Dominic had told me that rigid straps must be used because the elastic ones were illegal so I used a rigid strap as required, although I will later add elastic straps as a backup.
Gas cylinders in position

I then did a lot of painting.  Painting the section behind the mast was a must-do project because once the mast is back in place access to that area for painting will be impossible. After considering the use of one-part enamel paint I decided keep using 2-part paint because it is so much  stronger and durable than the easier to use 1-part paint, and once I laid a coat of 1-part it would be very difficult to go back to 2-part.

Then there was the inevitable mission creep.  I took Bruce's advice to paint the entire bulkhead rather than just the section behind the mast. Then there was the opportunity to fill in the many holes around the solar and wind controllers aft then paint that bulkhead.  After laying down the second coat of paint I had a lot of the expensive mix remaining so I hurriedly emptied, sanded, and cleaned one of the galley shelf compartments then laid its first coat of paint.  By the end of the week the mast and controller bulkheads as well as the two galley storage compartments had been painted with two coats.
Newly painted galley shelf compartments

For the record  I used: Northane 2-pack linear polyurethane paint, with 5% Northane brush thinner added.  I laid the bulk of the paint down with mohair rollers, 100 mm long with 5 mm naps and used throw-away brushes to trim along the edges.  It all worked very well.

Greg the marine electrician visited on Friday and we discussed the problem of the fuel gauge reporting 1/2 tank full when it is in fact full to the brim.  Either the sender has not been installed properly or, more likely, the gauge has not been calibrated.  We could not find the instructions in the boat so my task this weekend is to find the document in my crammed and disorderly garage.  Greg also took away the new LED light in the steerage compartment that failed after only a few hours of use.
Newly painted cabin bulkhead

Aft bulkhead repaired and painted
Muffler

Mark the mechanic also showed up.  His brief was to connect the engine exhaust hose to the recently repaired muffler (aka "pong box") then bleed the fuel system.  He used some sort of vacuum tool to speed the bleeding process, then the engine burst into smooth life on the first crank.  That was remarkable given that it had been idle with empty fuel lines for about 6 months.  The engine is in superb condition partly because I have been fastidious about maintaining it.  My big fault has been to not use it enough -  only 550 hours in 7 years.  In future I will push aside my purist aversion to motoring when there is any useful wind available and use the iron sail more, while proclaiming loudly that I am doing it for the sake of the engine.

Friday, December 7, 2018

Diesel, LPG, Lettering, Cockpit Drains

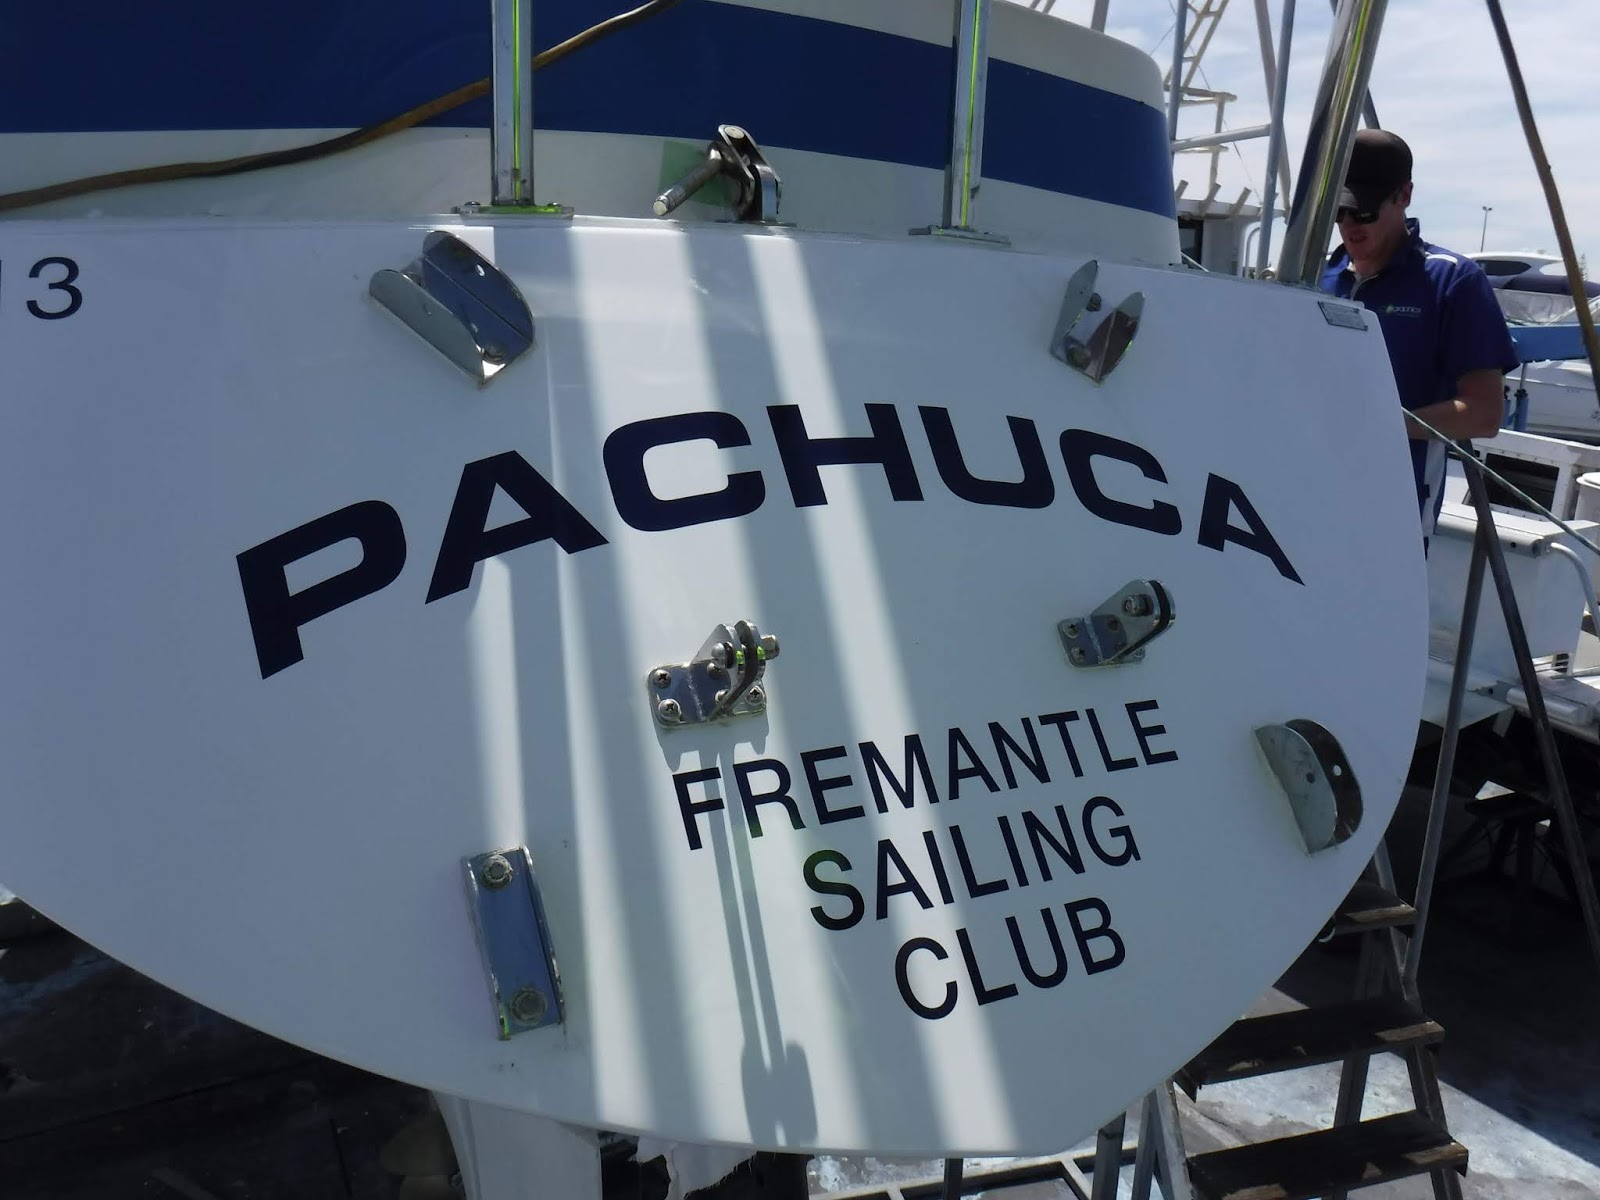
I arrived Monday morning to find gentle winds from the NE, ideal putting the new lettering on the hull.  I left a message for Nathan at Go Graphics and one of his people arrived an hour later and did a splendid job in remarkably short time.
New lettering


Dominic of Full on Gas visited and finished the task  of replacing the boat's LPG gas lines. He mounted the selector switch, reduction valve and solenoid assembly on top of the cylinder case (built of 18 mm marine ply and very strong) where the holes and bolts were already in position, then connected the new lines then checked the entire system for leaks using an LPG tank borrowed from Bruce.  (There were no leaks.)   He finished off by making sure that the stove and gas detector were working OK then officially certified the system on line.  Although the gas system had never failed me, we reckoned that the lines were originals from 1983 and it was time to change them.

One of the requirements from Dominic was that the ancient and badly scratched acrylic companionway sliding door be replaced with one that had ventilation holes.  Bruce took the old door to a business that made a beautiful replacement from polycarbonate rather than acrylic, with holes drilled at an angle so that rain would not pass through.   The view from inside of the boat through that new door was amazing and Bruce put the idea into my head of replacing all of Pachuca's windows with polycarbonate.  Looking through the existing windows is like looking through severe cataracts must be.  Yes, they are great for privacy, but wouldn't it be nice to look at the ocean going by from inside the cabin.
New polycarbonate doorway

Great view to the outside

By then Bruce had noticed something disturbing: the thru-hull fittings for the  cockpit drains were both loose: we could rotate them very easily by hand.  Bruce noted that the fittings were hard against the fiberglass hull on the inside rather than  on backing plats, and he reckoned that the fittings no longer had adequate caulking.  This was serious and had to be rectified, and I thanked  Bruce for pointing out the problem.

We enlisted the help of the mechanic from M and J engineering who had arrived to align the boat's propeller shaft and Bruce telephoned Zelko to fabricate the wooden backing plates.  The clamps and hoses were removed with little trouble, as were the elbows and ball valves.  However, removing the thru-hull fittings was very difficult, primarily the port one which had a hopelessly frozen nut and had to be removed from the outside.
Zelko doing a spell at the flange

Backing plates prepared by Zelko on short notice

Beautiful 316 stainless steel

Thru hull fittings in place

That required patient work with an angle grinder to make small cuts in the outer flange to yield small wedges which could then be lifted with a hammer and screwdriver, all without damaging the GRP hull.

By the end of the day the thru hull fittings were in position, with the use of Sikaflex 291 as a bedding compound and on the threads.  A small amount 2-part "Mapoxy" was used on the port side as bedding to repair minor scratches left on the gel coat as a result of removing the old fitting.  Bruce was unexpectedly tied up with another problem on the next day, Friday, and we expect to attach the elbows, ball valves, and hoses on Monday.

While doing this work Bruce noticed that the inlet to the muffler ("pong box") had a crack that had been repaired sort of by someone probably in the USA and he sent it out for repair. 

I occupied my time on Friday painting two bulkheads with Northane 2-part linear polyurethane paint, with 5% Northane brushing thinner.

Now that I have the  "feel" of 2-part painting again I hope to paint the galley shelves and other areas whenever I get spare time.


Saturday, December 1, 2018

Fuel Lines and Bow Rollers

We connected the diesel fuel lines.  The work was difficult because the fuel inlet and breather hose connections are next to each other on the port side coaming, meaning that we had to work on our backs with one arm extended up the narrow cavity of the coaming.  The work spanned two days but in the end I was satisfied with the special hose sealant that Bruce had provided at some effort and the tightness of all of the clamps.
New fuel filler line in position

I found it impossible to route the stiff and heavily ribbed fuel hose through its original path with its tight bends in constricted spaces and suggested that we cut a new hole in the lazarette.  I am glad that we did that because I could then see how the incoming fuel will now had a much smoother path into the tank.

On Monday we will put 30 liters of diesel into the tank and for the first time I will have the pleasure looking at what the new fuel gauge reports.  Then we will contact Mark the diesel mechanic who will return to the boat to bleed the engine and give it a test run which must be short because there will be no cooling sea water.

I picked up the bow rollers and pins from Mirko at "Vision Design" in Bibra Lake on Friday afternoon.  We had dropped them off earlier in the week for more work after we found that the rollers refused to roll because they fit so tightly between the 6mm plates and requested that 2mm be taken from each end of the rollers.  We also needed a way to prevent the pins from falling off the bow fitting and it was agreed that holes would be tapped near the ends of the pins into which retaining grub screws would be fitted after the pins were in position. 
Pins to hold anchor rode on the rollers

I fitted the rollers on the bow and could not believe how easily they turned.   I am looking forward to the prospect of working my anchor rodes  without the extra noise and effort of dragging them over static rollers.

 On Monday we'll fit the pins and if that goes well as expected we'll sign off on the excellent work by Vision Design with both the bow roller system and the binnacle frame.

On Friday I also had a brief visit from Go Graphics sign writing to discuss the replacement of the broad blue line along the outside of the coaming that we had discussed months earlier.  We agreed that it would be a waste of money to replace that line until the entire area was repainted, and I will not have time to do that during this refit.  When the time comes I will contact the firm to coordinate that work with one of my future maintenance haul outs.

The lettering has been prepared and I can  expect it to be laid on the transom in the coming week.

I also expect a visit from Dillon to better align the propeller shaft, which Bruce has deemed too far off centre for safe motoring to Pachuca's pen.

There were also visits from Greg Hansen and Dominic regarding the boat's LPG gas system.

Dominic stripped out the old gas lines, which we agree must have been the originals from 1983.  He looked over my cylinder  housing setup with the reduction valve mounted on top and approved.  He had also instructed that we must have ventilation holes in the sliding companionway "door" and we have ordered a new one made of stronger material and to be tighter fitting, to minimize a gap along the top of the cover which, when one thinks about it, would have provided probably more ventilation that the new door will.  Dominic will return at some indeterminate time to complete the installation of the new lines.

Greg Hansen visited to replace the failing gas sensor in the lazarette then certified the gas detection system.  We tested system by giving each sensor a whiff of methylated spirits.

Blog Archive

Contributors

Statistics Click Me