
After being given an extension we were able to move the boat out of the work shed onto a hard stand on 6 August. The working environment was radically different given that we were now fully exposed to the weather, but nevertheless I much preferred working in the open, in full view of the marina and Cockburn Sound.
 |
| On the Hard Stand |
The following is a summary of the situation:
- The rudder has been practically rebuilt. It was split in half, cleaned out, filled with new foam, and re-fiberglassed. Special measures were taken to prevent leakage through the joins to the rudder shaft. I can now look forward to sailing the boat with the rudder providing buoyancy at the stern rather then weighing it down with water.
- The propeller is back on with a straightened propeller shaft and new cutlass bearing, courtesy of Precision Marine.
- The base plate supporting the mast compression post has been fabricated of 10mm marine grade aluminium, has been powder coated and is ready for fitting.
 |
| Bruce with New Base Plate |
- Bruce has almost completed the osmosis treatment, and only a few repairs need to be faired. I ran my hand over the repairs and was amazed at the smoothness of the result.
- In working on the main hatch to smooth its slide action we discussed the problem of the fiberglass cover under which the hatch slides, known to some as the "garage" and others as the "turtle". The problem was that it was extremely difficult to avoid standing on the garage when attending to the end of the boom, particularly in rough seas.
 |
| New Teak Hatch Cover Protector |
In consultation with Zelko it was decided that he would fabricate a teak cover over the garage. This would allow one or two crew to stand on the platform to work on the boom and would provide a nice vision of teak that matches that at the bow. A very special plank of top quality teak was ordered, with the photos sent to Zelco to confirm that the grain ran as he required. As I picked up the plank to deliver to Zelko's house I asked about the quality of the teak as I handed over $535. The man proudly assured me that it was top grade teak out of Burma. Zelko then milled the wood into boards and fabricated the cover. The result was outstanding, and up to the standards of Zelko's very experienced craftsmanship.
- The new stainless steel water tanks have been completed and are being stored in a container not far from the boat.
- Bruce, Zelko, and I had a discussion about the extremely very unsatisfactory access into the lazarette under the rear seat. The unsealed doors allowed water to curl into the lazarette from the seat above and also enter from below whenever the cockpit was flooded with more that 75 mm of water. The decision was to replace the doors with a curved plate that would fit over the opening and held in by flush fasteners.
 |
| Bruce holding up new lazarette access cover |

I am very much looking forward to the prospect of sailing in a rough sea without seeing water sloshing side to side on the lazarette floor before it works its way down into the bilge. The will represent another correction to a building/design problem.
- The tiny 6 mm diameter rear cockpit drain has been replace with much larger 13 mm diameter one. This required a new hose and larger through-hull fitting and the work had been magically completed when I returned from the trip.
- Another magical completion was the replacement of the old-style aluminium Whale Gusher pump on the starboard side of the cockpit. This pump probably dated from Pachuca's construction and had never worked. It was designed to drain a void below the cockpit where water was trapped and could not flow into the rest of the bilge unless the void filled up and overflowed. Now I have two modern and working Whale Gusher pumps at the cockpit to complement the electric bilge pump in the cabin.
- The big problem that emerged during my absence was the state of the boat's fuel system. I had discussed with Bruce my concern that the fuel tanks were completely sealed other than the drains at the bottom for removing water in the fuel. The tanks each held 70 litres of diesel and I always kept them full in order to avoid the introduction of water through condensation. However, I use no more than 40 liters of fuel a year, meaning that the diesel must have been getting staler and staler as time passed. I had placed my hope on the generous amounts of biocide fuel conditioner that I use and the fact that the fuel vacuum gauge never indicated a clogged fuel filter.
 |
| Unhealthy Colour of the Diesel Fuel |
 |
| Flakes at the bottom of this pour |
 |
| Discarded pump, fuel lines,, tanks, etc |
 |
| Rust on fuel tanks |
Because the fuel tanks were exhibiting rust and in any event could not be cleaned because there was no access to the interior it was decided to replace them.
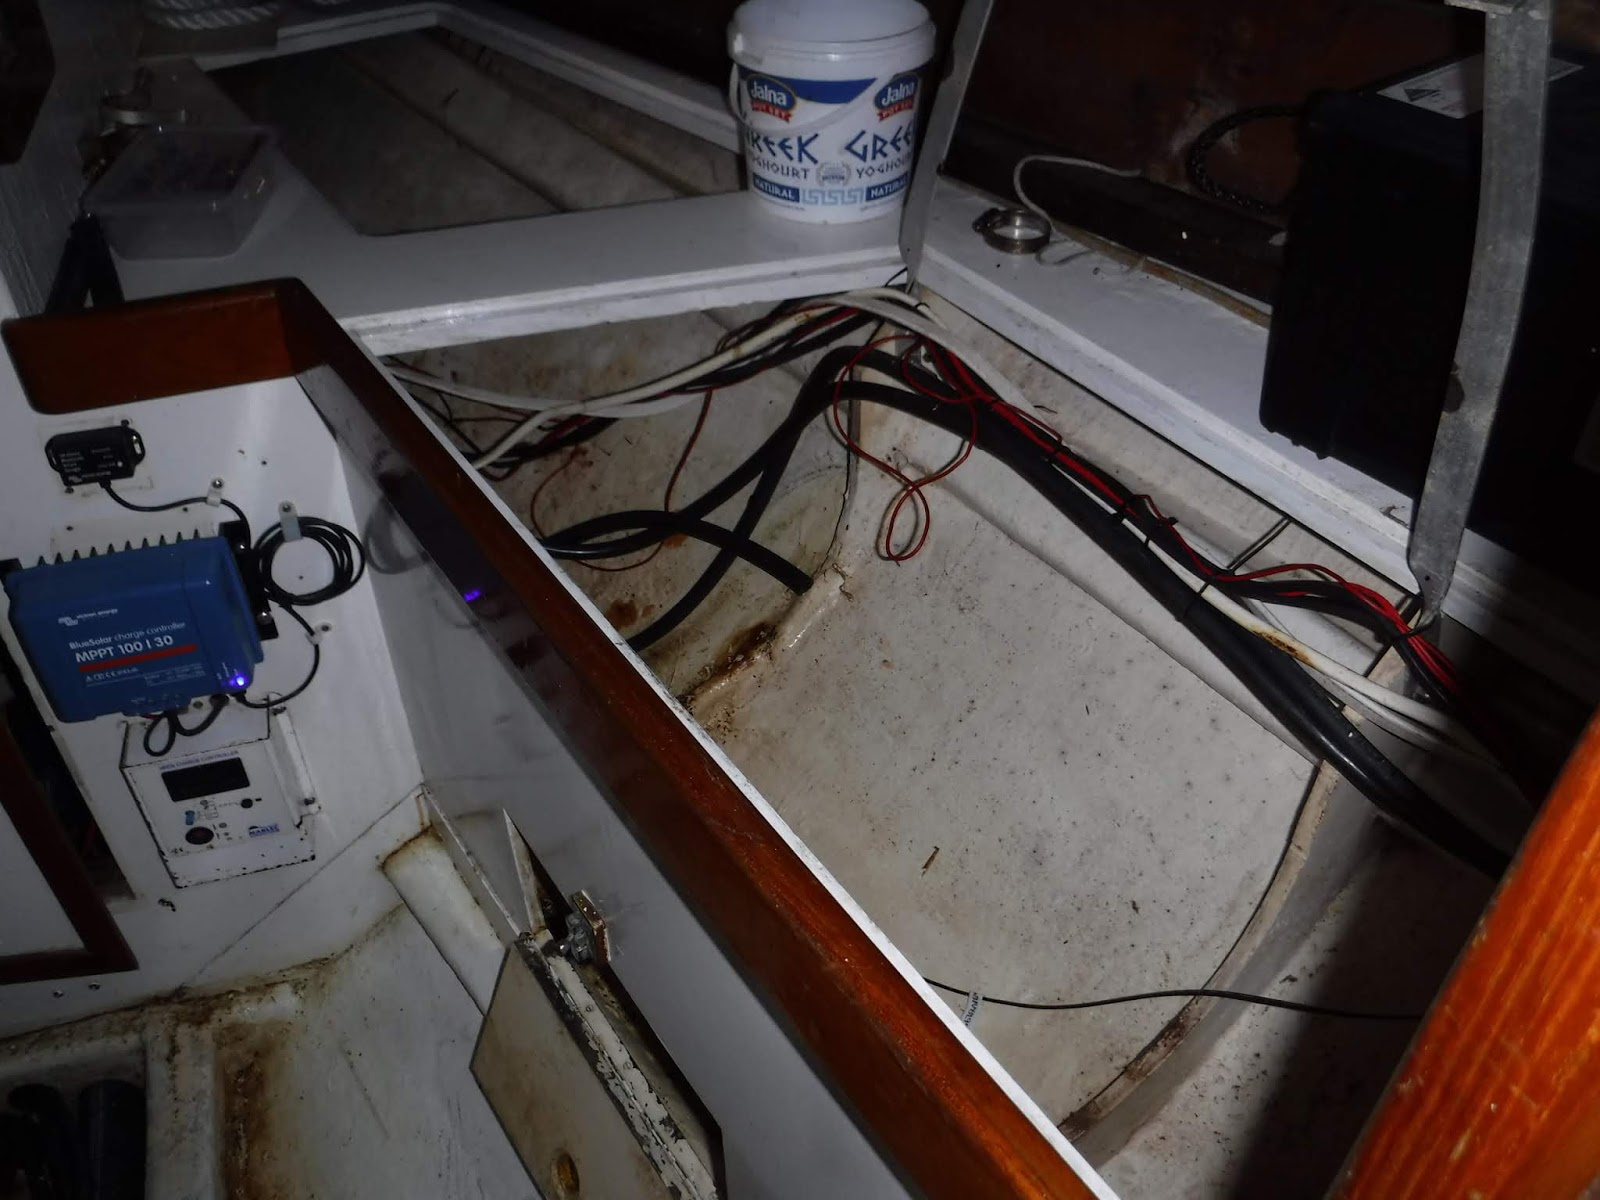
By then Bruce had come up with another idea. Access to the the area beneath the cockpit had been impossible due to a wall of batteries acting as a barrier. This battery layout had been set up in Opua NZ while Brenda, Arnold, and I had been touring the North Island and I considered it to be imaginative and satisfactory. But the area contains important items of equipment such as the cockpit drain shutoff valves, autopilot, and manual steering. Sailing the boat without fast access to this area represents a risk.
Bruce suggested placing the batteries in the aft section of the quarter berth lockers. This would reduce my storage space which I considered a worthwhile tradeoff for gaining access to the below cockpit area. We started measuring and ran into space difficulties in fitting the batteries. I then proposed idea to Bruce: fabricate only one tank to be put in the narrower port port locker space and place all three batteries in the wider starboard locker space. Bruce took to the idea immediately and careful measurements that included the use of cardboard cutouts confirmed that the plan was feasible.
My measurements of the proposed tank suggested a rough capacity of 220 litres, a significant improvement over the previous 140 litre capacity from the smaller and round tanks. The gain in capacity was due to the straight sides of the tank and much longer length. That night I arrived at the following weight distribution calculations:
Century CR12-270 DA ... 74 kg
Century N20 MF ............. 32.1 kg
Fullriver DC210-12 .......... 60.5 kg
Total
Weight of 220 litres of diesel: 184 kg on the port side.
After Ron's preliminary measurements it appears that we can expect 200 litres of diesel weighing 166 kg. You cannot get better balance than that!
 |
| Batteries blocked access to under-cockpit space |
 |
| Site of new fuel tank |
I am looking forward to for the first time know how much fuel is in my tank rather than keeping track of engine hours.
1 comment:
Still reading your blog Robert! Hope to see you in 2019 Nigel and Patrick.
Post a Comment