
Zelko has done a lot of good work in the cabin. After giving us access to the toe rail bolts he installed several small beams on each side of the cabin to support the deck. By the time I left the boat on Monday he had filled the space between the beams and deck with a strong compound which should result in a firm deck.
 |
| Two deck supports (red) |
 |
| Zelko the master teak man with Bruce working in lazarette |
He also fabricated new ceiling panels in order to replace several that had either been damaged or been modified for various reasons, such as the void left from the removal of the boat's original radar unit. This was not as easy as cutting the panel to shape then flexing it to fit the curved ceiling. I was amazed to learn that he had to first scribe a pattern of the curve then use the mold to glue the sheet of wood to the laminate on the correct curve. I had not anticipated this much effort going to the cabin ceiling but Zelko is doing terrific work and the boat will be much better for it.
Zelko's next job will be to fabricate two teak supports for the life raft. Their function is to provide flat supports on the curved deck.
Bruce and I had to accept the fact that the three heavy batteries must be removed in order to obtain access to the space below the cockpit. He had lined up two strong men to do the job but the slightly younger Bruce who is strong as an ox and this old dog Robert managed to do it with surprising ease. The key was patience, analysis, teamwork, and much grunting at the appropriate moments. I then spent some time removing the battery cases to give untrammeled access to the area for the first time since Mexico.
Bruce inspected the area and although he spotted corrosion amenable to treatment in several places he did not see anything grossly out of order. No problems were detected with the steering quadrant or the linear arm of the autopilot.
And finally I had access to the four bolts holding the external ground plate (dynaplate) for the HF radio's tuner. I had connected the tuner to the ground shoe using several layers of the prescribed thin ribbons of copper (to maximize surface area minimum resistance) but they had degenerated significantly due to corrosion, particularly along the floor of the lazarette. Having said that, the setup provided me with excellent HF radio propagation because I was able to maintain twice-daily radio communication with South Africa until I reached Cape Leeuwin at the SW corner of Western Australia. There are four bolts passing through the hull from the dynaplate, and I will talk with Greg Hansen about laying a pair of relatively heavy cables from the tuner to two ground shoe bolts.
The toe rails were removed and Bruce shocked me when he showed me the gap between the deck and the hull. Sometimes the gap was as much as 5mm wide, and it was particularly bad near the bow. He reckoned that this explained most of the water invading the boat when I went hard to weather. Bruce could not explain why the gap had not been sealed during the manufacturing process. "So ... What is holding the deck to the hull?" I asked rhetorically. We figured that the screws holding the toe rails to the hulls were performing that role, but I did not find that satisfactory, hoping that there were at least a few dabs of adhesive that we could not see.
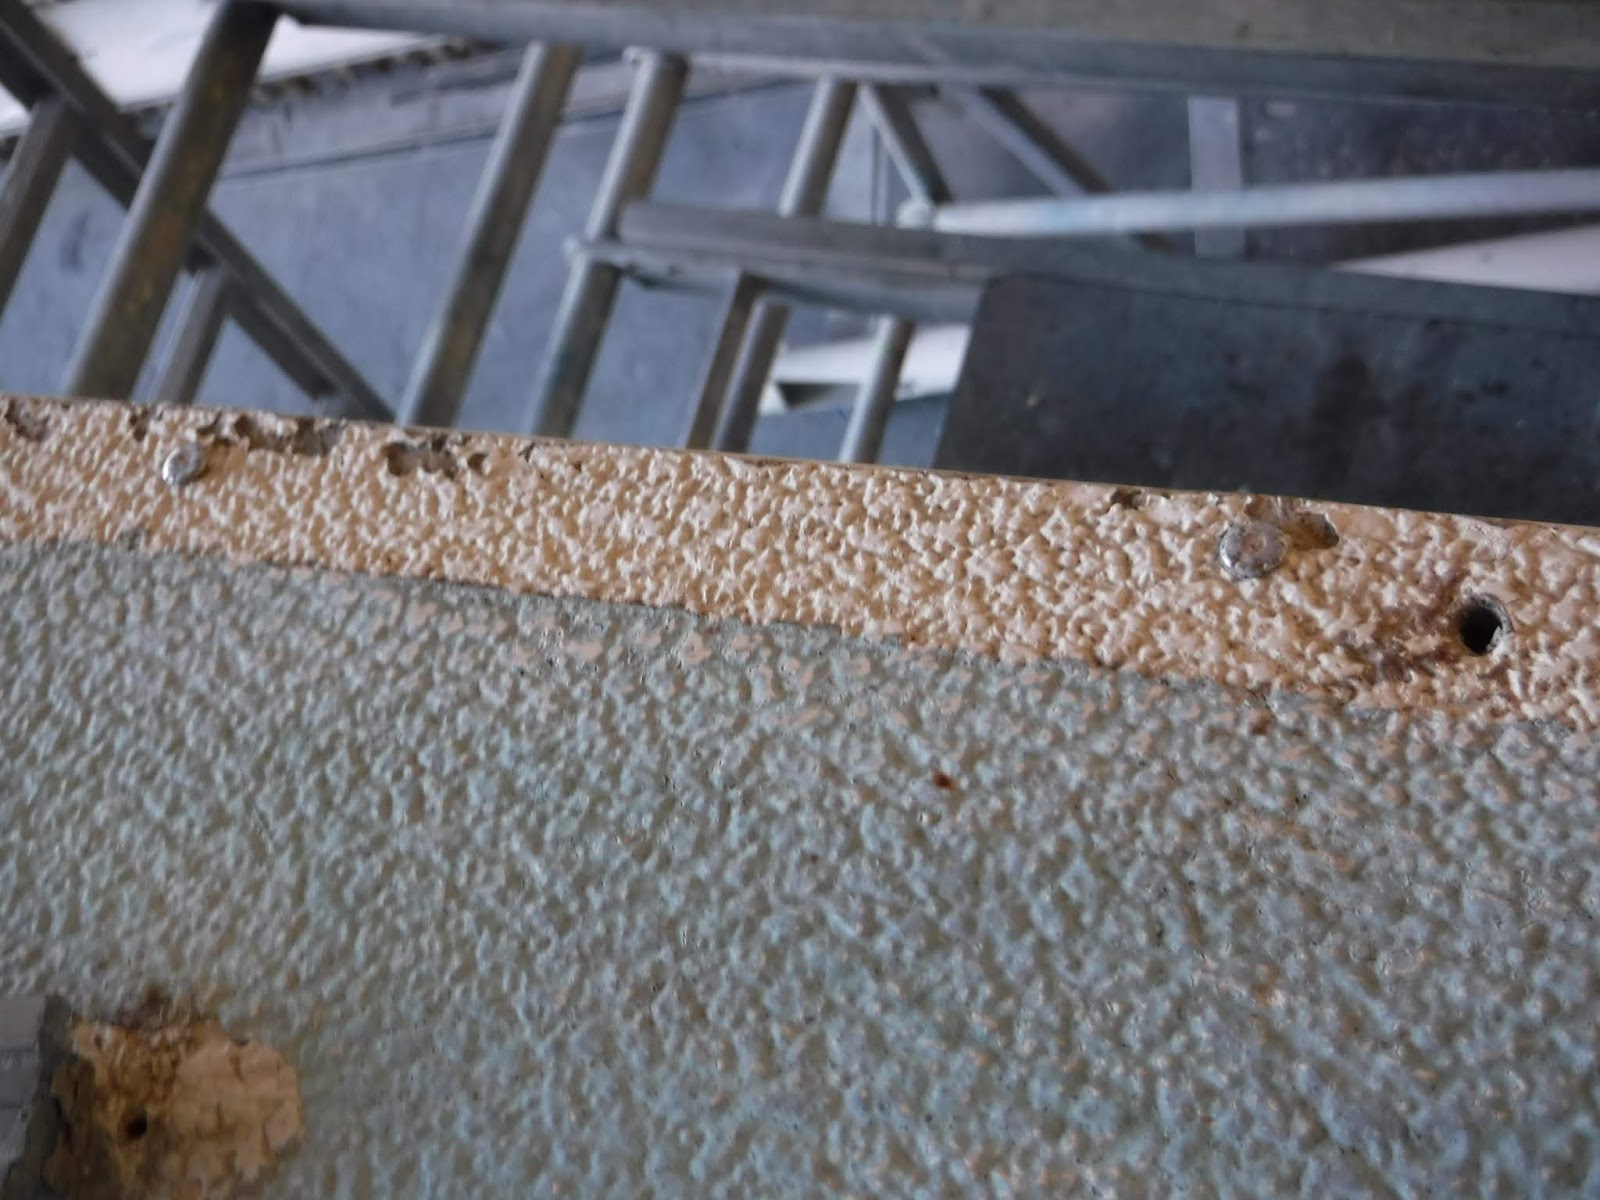 |
| Two rivets at left and right |
 |
| Closeup of s/s rivet |
Anyway, at this point we have identified three likely vectors for the huge amount of water entering the boat when I sail her hard to weather:
1. The "boot" around the base of the mast which had deteriorated and was probably leaking huge amounts of water which for some reason I was not able to detect from inside of the cabin
2. The two large "horn" cleats at the stern which had gaps at the base through which one could see daylight, which could explain the constant slosh of water in the lazarette
3. The gap between the deck and hull. Although I could not see water streaming inside of the hull, incoming water would possibly have run along the upper stringers to drop into the boat along the starboard and port shelving amidships, or maybe all of the way back to the lazarette where I could not see very well.
I complained about the main hatch dragging to the point that I had trouble emerging from the cabin during my run to the Horn so we removed it and its "garage/turtle" entirely. The slides were heavily corroded and we cleaned them back to bright brass and will probably lubricate them. I am still not happy with some "proud" screws holding down the brass slides because the holes had not been drilled exactly perpendicular to the surface, but we'll see how it works out.
The battery cases must be either strengthened or rebuilt. We had decided to give the job to Zelko but on reflection I am very capable of doing the job myself and will allow Zelko to do the jobs beyond my skill.
Another job I asked Zelko to do was to do a cut out of the door into the electrical panel so that I could fit a new 6-switch panel. The idea is to fill in the holes in door left by removing the instruments from the old SAAB engine while providing much needed relief for the overcrowded main breaker panel. We had a very good discussion and he suggested that I have a suitable rectangle of 3mm perspex made up with a cut out to accommodate the new panel. I have done that by engaging BCJ Plastics to do the job. Steve at BCJ is a pleasure to work with. I sent him a photo of my plan, we refined it a bit (e.g. added 1 mm to the cutout dimensions to accommodate expansion) and it will be delivered within 7 days at the modest cost of $55 plus GST.
 |
| New switch panel |
At Bruce's suggestion I washed the bottom of the floor panel over the main part of the bilge with the plan to sand it and cover it with a fresh coat of waterproof material.
At great trouble I was able to source two rectangles 12mm and 15mm thick rectangles of "Seaboard" marine grade polyethylene material so that Zelko can fabricate new stanchion bases. I had used this 12mm material to replace some of the stanchion bases in Mexico and found it to be excellent. Zelko will use the 15mm material for the stanchions and will use the 12mm material for backing below the deck. It took some effort to source the material from off-cuts because a sheet 1.2m x 2.4 m costs $700 and I got the material that I required from BCJ Plastics for about $100.
 |
| Flooded floor |
 |
| Cover of drain floated off, leaving open drain hole trap |
During the week Bruce noticed the persistent flow of water into the bilge and tracked it down to a suspect leaky water tank. We removed the tank and confirmed that it was leaking due to corrosion at the welds. I decided on the spot to replace both tanks, remembering the rusty water that I had been forced to drink during the four months from Mexico round the Horn to Argentina.
 |
| Port tank removed for replacement |
We have gone as far as I can see in taking the boat apart and we should soon begin the task of putting it together again.
Ahead are repainting of the boat's topside, deck, and mast.
No comments:
Post a Comment