

Arnold brought me back to the boat last night so that I could get an early start this Monday morning.
The first thing I did was to replace the faulty cockpit switch that controls the electric anchor winch. Arnold and I had managed to find a replacement at his local West Marine. The entire system is now working well and the wiring at the bow has been upgraded to hopefully give me years of trouble-free service.
Then I replaced a shackle joining two lengths of 3/8" chain on my spare rode with a proper joiner that comes in two halves and is made one by hammering four metal pins. I can't be sure that the joiner is as strong as an ordinary link as the man said, but it does look strong enough. The two halves will stay together because I've flattened out the four pins and the forces on the joiner act to keep the halves together. It passes through the windlass gypsy just fine. I will probably use one of those joiners to add a 22m length to my primary rode to yield 60 m of all-chain rode.
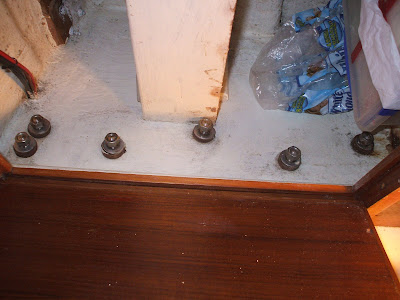
How do you remove a chain plate when you've never done it before? Well, you get started and hope for the best. I began work on the port chain plate at noon. First I removed the surrounding caulking on deck. Then I removed a section of the cabin ceiling to expose the entry through the deck. After that I started the process of removing the three shrouds from the chain plate. I used a spinnaker halyard to secure the mast to the port side then fixed the shrouds one at a time through shackles that I had put on the toe rail. For the D1 and D2 shrouds I used cord, but for the cap shroud I used all metal. Then I spent literally hours removing 11 bolts from the chain plate. Getting the nuts off was easy. The hard part was unscrewing the bolts through the wood one partial turn at a time. At 6 PM I had all of the bolts removed and my plan was to face the task of removing the chain plate the next morning. However, I decided to assess the difficulty of the problem and within 20 minutes I had the chain plate out.
I was extremely pleased to see that the chain plate does not appear to have any serious corrosion. I will clean it up in the morning and take it to Dan the rigger for a professional assessment. One of the tricks of the trade is to use acid to highlight fractures. ... I am convinced that the stainless steel use decades ago - 1983 in this case - is superior to the dodgy stuff we get today.
Tomorrow I'll probably remove the starboard chain plate. I'm confident that it will be OK too but I want to rebed both chain plates. Dan talked about using epoxy for rebedding and resealing. However, I am inclined to use something softer, such as Sikaflex or 3M 4000. The key to my removing the chain plate so easily today was that it had been bedded with soft material. I do not want to use a strong adhesive and leave a big problem later on for myself or a future owner.
When I see Dan we will decide on a priority list of work on the boat. I've already discussed with him the possibility of extending the track at the front of the mast so for storage and deployment of the spinnaker pole. It would be great to get the spinnaker pole off the deck. We might do something about various cars and fittings which have seen better days.
I am looking forward to sailing out of here knowing that my chain plates and rigging are reliable, with no more rain water dribbling down the chain plate.

No comments:
Post a Comment